

Are you unable to successfully add an outline in a Google Docs document to highlight your content in order of importance? Are you new to using Google Docs or text editors in general?
If you are, there’s no need to despair.
Google Docs’ Outline Tool is a function that many people struggle with – both if they’re using a computer or via a mobile device to access the Google Docs app.
Yet, all things considered, the app simplifies the document outline process considerably when compared to other text editors.
In this article, you’ll learn how to add an outline in Google Docs, how to generate one, how to remove headings, configure the entire document structure to your liking, and rank better in search engine results.
Here’s why the outline is important and how you can highlight the information hierarchy by using it…
Effortlessly export your Google Docs to WordPress with just 1-click.
Get Started TodayThe outline tool is a Google Docs feature that generates the structure of the document. It’s created from specific landmarks such as titles, headings, and even table titles.
This Google document index can be used to create a table of contents. At the same time, it helps with visualizing the document hierarchy.
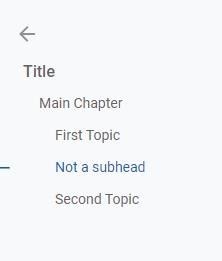
For this article, the outline looks like this in Google Docs:
Scale your content production. Click here to get a free download of the outline templates we use to create 350+ pieces of content every month.
A document outline is important for authors, readers, and search engines. With the outline enabled, authors can easily assess if the content structure is good and if it’s highlighted in the correct order of importance. It also allows easy navigation to specific sections of an article.
For readers, it’s all about navigation and having an overview of the document’s important topics of discussion. The outline can be even more helpful to readers accessing a Google document from mobile devices.
Headline tags matter to search engines too. They’re powerful tools in SEO and great for putting in relevant keywords. Since they summarize important information, search engines determine page content structure by looking at headings.
Working with an Outline can be difficult at times in Google Docs, especially if you don’t do a lot of work in text editors. Yet it’s still much easier to manage the outline tool as opposed to a program like Microsoft Word.
This is what you need to know about how to create and customize your outline in Google Docs.
By default, Google Docs has the document outline tool function already enabled. If you click on the ‘View’ button you should see the ‘Show document outline’ feature ticked.
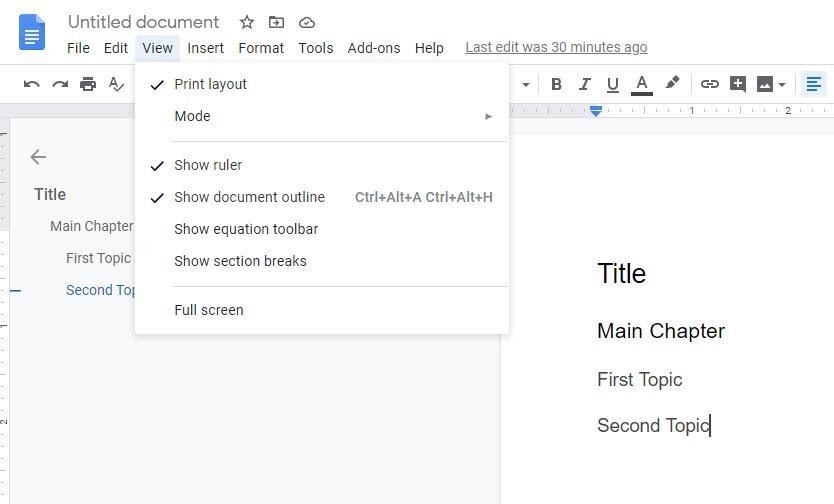
That said, the outline may not show until you click on the ‘Outline’ button in the upper left corner of the screen.
If for some reason the outline feature isn’t enabled, simply activate it from the View menu. There are also two commands you can use to turn on the outline:
If you’re working from an Android device or an iPhone you enable the outline differently. After you log into the Google Doc app, tap on the three-dotted More icon. This brings up a list of options, including the Document Outline. Tap it to enable/disable it. Note that the outline is displayed at the bottom of the screen.
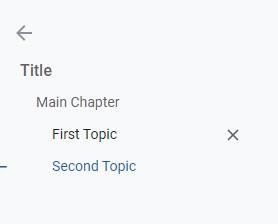
What’s interesting here is the fact that you can customize the outline. Say you’re breaking up the text with multiple headings, but not all of them are relevant to a table of contents, for example, or for navigation.
You’ll notice that when you highlight a heading or tagline on the document outline an X will appear to the right. Clicking the X button removes that heading from the outline but not from the document itself.
You can also add headings manually to an outline, if for some reason Google Docs doesn’t add them automatically. Select a line of text and change it from Normal Text to a heading style of your choice.
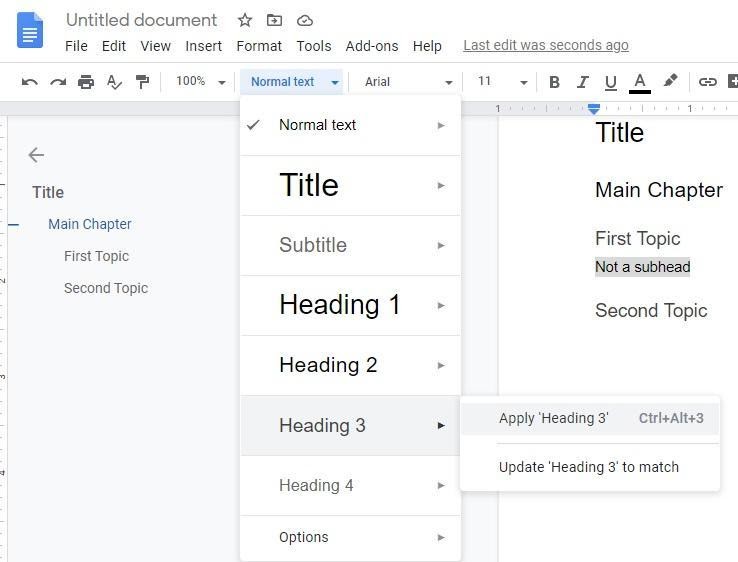
This can be very useful when you’re not sure what headings would break up the content better and highlight the hierarchy.
First, you want to create your thesis statement for your content. After that, list all the main important points that back your thesis. List additional arguments for your major points. Highlight relevant text and set it to a different heading style so that it’s added to the document outline automatically.
A document outline view is a hierarchical outline that creates an organized overview of a document. It allows you to view different heading levels and how they break up the content. It also still shows all the text in the document as a normal layout view, because the outline itself is shown separate of the document pages.
Unlike outlines, page borders aren’t supported in the Google app. However, you can get around this by creating a one-cell table that takes up the entire page. The app does have border support for paragraphs which can also be useful in some situations.
If you want to allow everyone to access your document and navigate it using your newfound outlining skills, you need to make it public. For this, you have to navigate to Share > Advanced > Change link and then select the Public option.
Making an outline is sometimes not enough. You may also want to adjust the margins to make your document look better. Navigate to File > Page Setup and then adjust the margins accordingly. This will create extra separation from the edges and better highlight the content.
Bonus Tip: If you’re using Google Docs to outline a travel itinerary or guide, consider using the outline feature to organize your content by location. This can make it much easier to change your location on an Android device later and follow your planned route based on the different sections of your document.
Hopefully, you now have a better understanding of how the outline feature works in Google Docs and its general importance when writing, posting, and reading any document. It’s a feature you can use in both short and long documents in order to allow quick navigation to topics of interest.
And don’t worry, since it’s not something that shows up when printing a document, unless you generate a table of contents to go with it. It’s a simple yet effective feature that’s automatically enabled most of the time. One that you can edit to your liking.