
Looking for the best way to backup a WordPress site?
Backups are important because they ensure that your site’s data is always safe. But backups are only useful if you…actually take regular backups.
That is, if it’s too difficult to backup your site, you’re probably going to forget to do it…and that means you might not have a recent backup when you need one the most (not good!). Also don’t forget that in addition to backups, often there is a physical loss of data on hard drives or servers. To solve this problem, many companies use such programs as Data Recovery Software.
To help, we’ve written this tutorial for one of the most popular WordPress backup plugins.
In this guide, you’ll learn how to backup a WordPress site and:
Ready for the best part? All of this is 100% free! Yup, leave your wallet in the other room – you won’t need it for this tutorial.
Let’s dig in so you can keep your WordPress site’s data safe and secure…
For this tutorial, we’re going to use a free plugin called UpdraftPlus.
Here’s why we recommend it…
First off, it’s super popular and well-rated. This plugin:
Second, it has all the important features that you need in a WordPress backup plugin.
Once you get it set up, it will help you automatically backup some or all of your WordPress site to a secure, off-site location of your choice. Beyond that, it can also help you restore those backups if you ever need to use them in the future (after all, backups are only useful if you can actually use them when stuff goes wrong). With that in mind, understanding WordPress development can make it easier to manage backups and restore your site effectively when needed.
Here’s how to set things up…
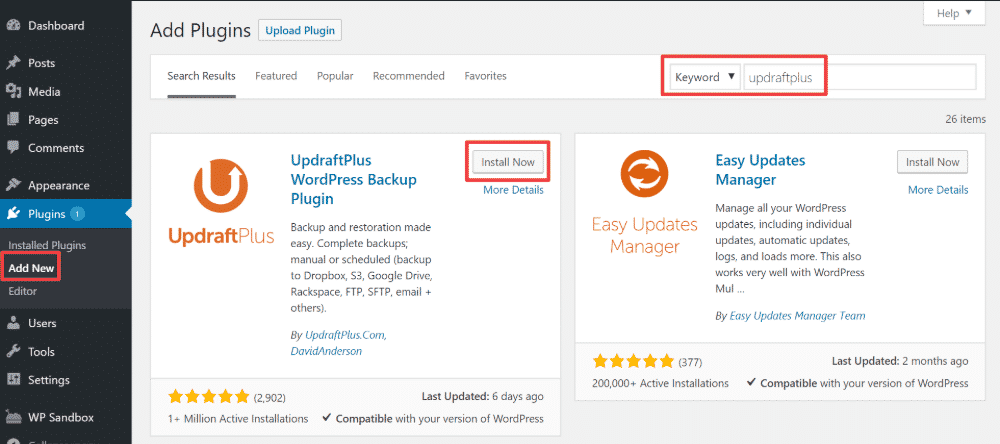
UpdraftPlus is listed at the WordPress.org plugin directory, so you can install it right from your WordPress dashboard.
To get started, go to Plugins → Add New. Then, search for “UpdraftPlus” and use the button to install and activate UpdraftPlus:
Before we go further into automating your WordPress backup processes, let’s cover the simplest application of this plugin:
Manually creating a backup of your site.
This is a good thing to understand because you’ll still want to create a manual backup before making any big changes, even if you have an automatic backup schedule.
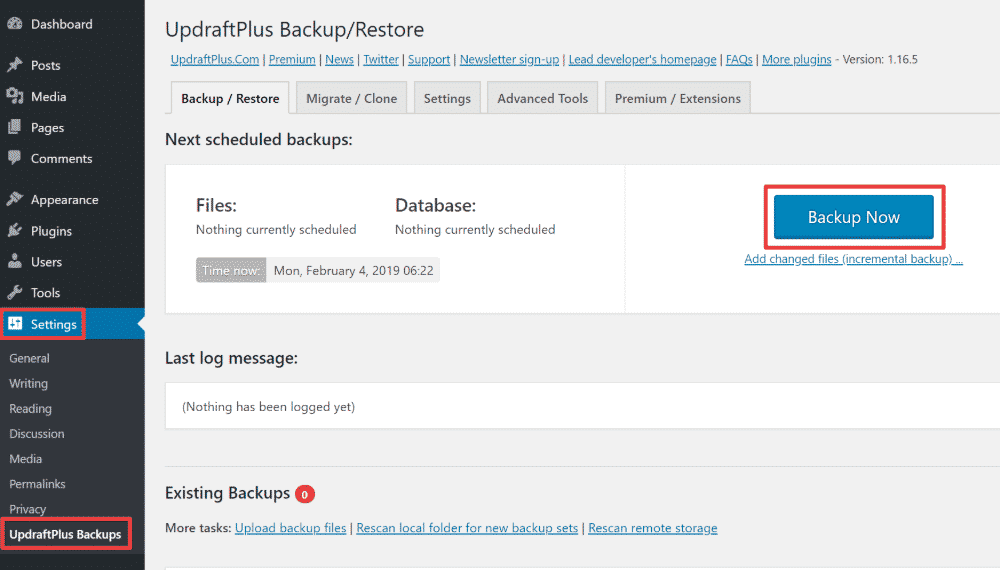
It’s also super easy to do. Now that you’ve installed and activated the plugin, you can go to Settings → UpdraftPlus Backups to access the plugin’s settings.
To create your manual backup, just click that big blue Backup Now button:
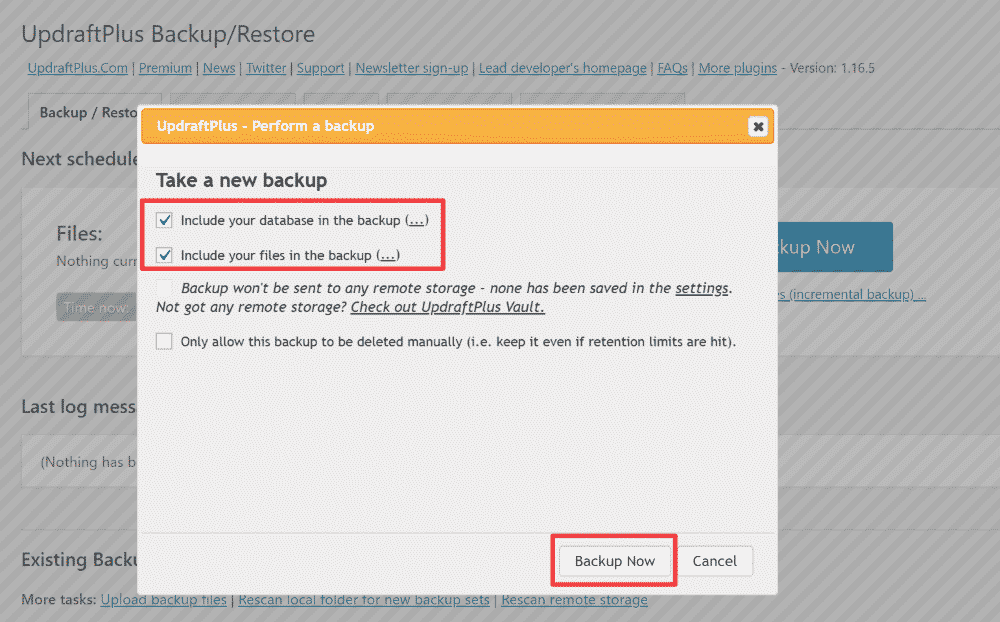
Clicking that button will open a popup where you can choose what to include in your backup. For now, you can leave the first two boxes checked (the default) and just click the Backup Now button again:
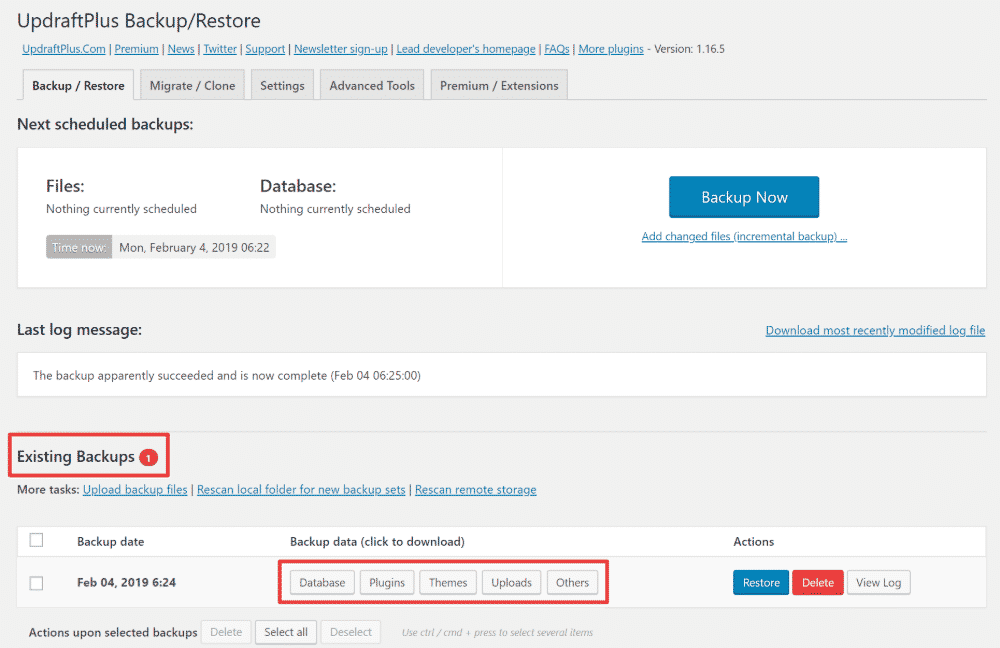
Now, UpdraftPlus will start creating your backup. If you have a large site, this process might take a little while. But once it finishes, you should see your new backup appear in the Existing Backups section.
To download your backup files to your local computer, you’ll need to click all five buttons in the Backup data column:
Congratulations! You just backed up your WordPress site. Now, let’s put things on autopilot to make your life a lot simpler…
Next, you’ll want to connect the plugin to your favorite cloud storage service. That way, the plugin will be able to store your backup files on the cloud storage service, rather than your WordPress site’s server.
This is important because it’s a really bad idea to store your backup files on the same server as your live website.
Why? Because if anything goes wrong with your site’s server, you’ve lost both your live site and your backups! That’s why you never want to have a single point of failure when it comes to your site’s data.
This same principle applies at the infrastructure level within modern data centers. Software like Nlyte’s data center infrastructure management (DCIM) helps operators eliminate single points of failure by providing real-time visibility into power, cooling, capacity, and asset dependencies. By understanding exactly where workloads, storage, and backups reside—and how they’re supported—data centers can ensure the cloud services powering backups and applications remain resilient, reliable, and continuously available.
To get started, go to the Settings tab of the UpdraftPlus interface. Then, you can select your favorite remote storage service from the list:
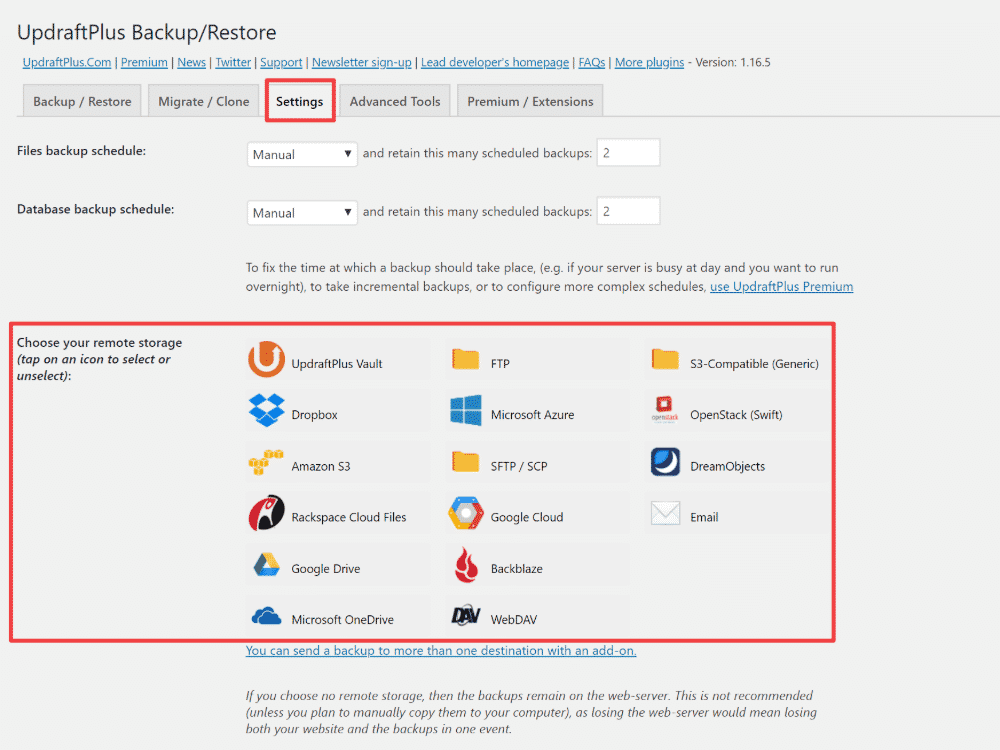
For this tutorial, we’ll use Dropbox. But the same general principles apply to all of the services – the steps might just be a little different.
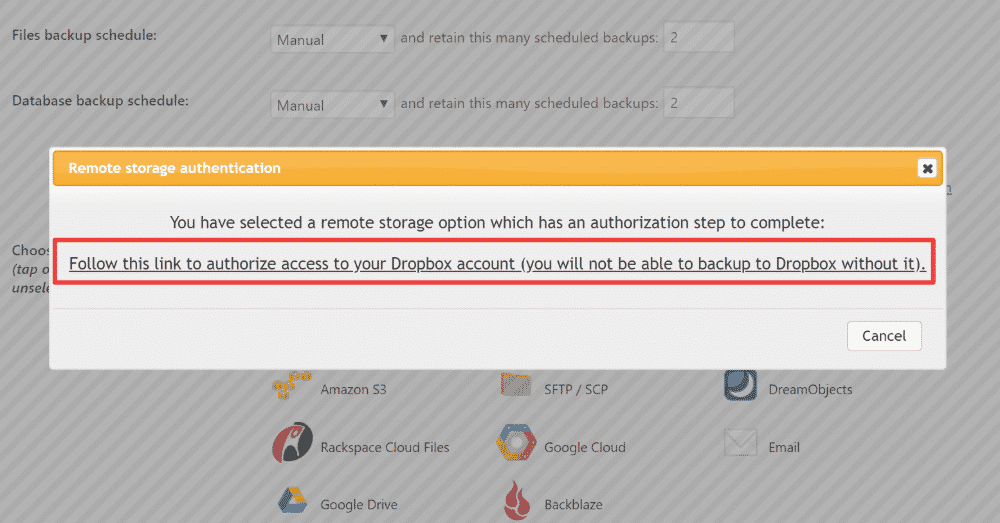
When you click the Dropbox icon, you’ll see a new set of instructions appear underneath the list of icons:
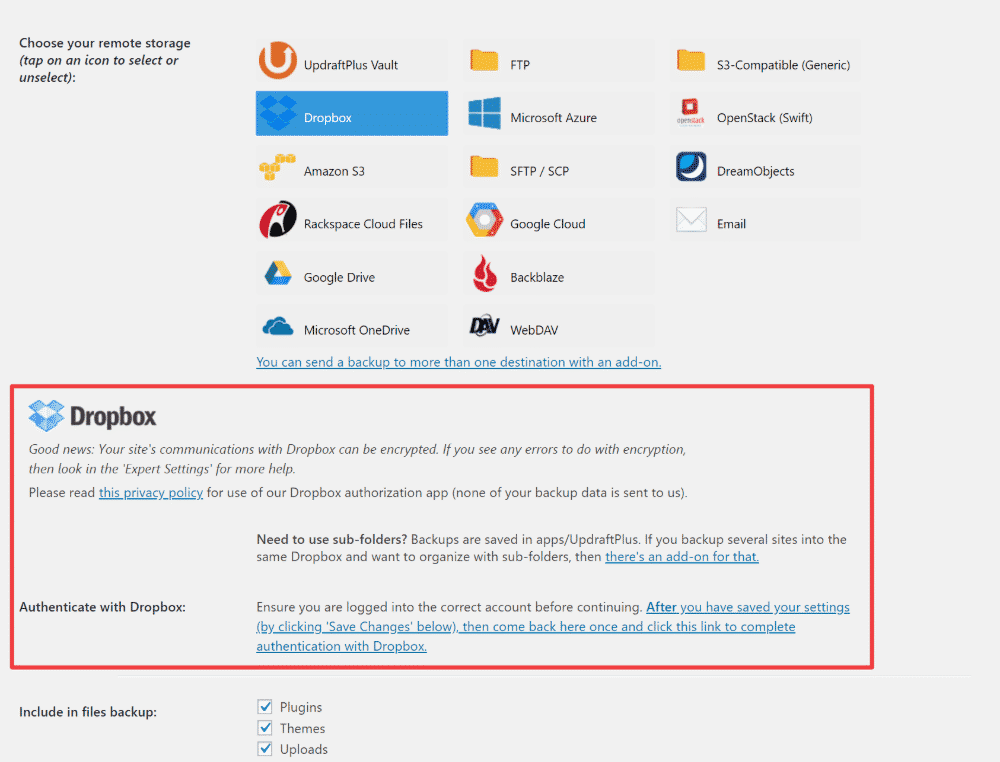
To connect UpdraftPlus to Dropbox, you need to:
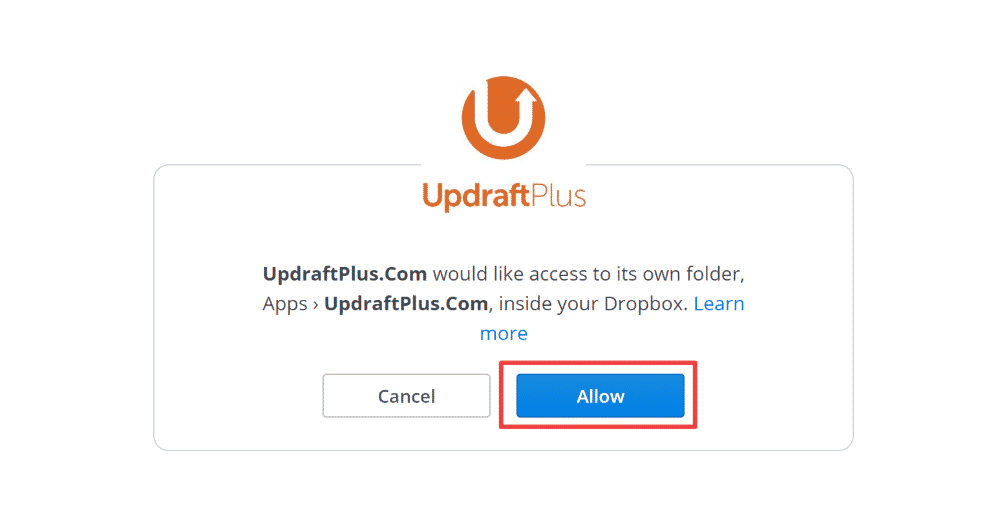
This will open the Dropbox website, along with a prompt to give UpdraftPlus.com access to its own Dropbox folder. Click the Allow button:
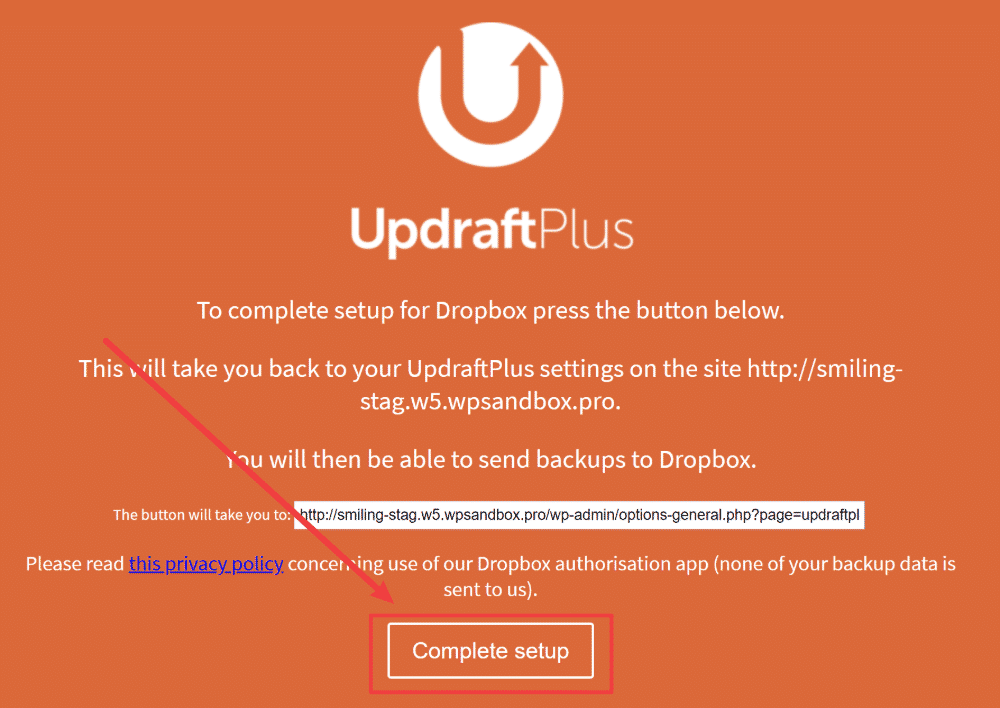
That will open up one more window. All you have to do is click the Complete setup button to finish things out:
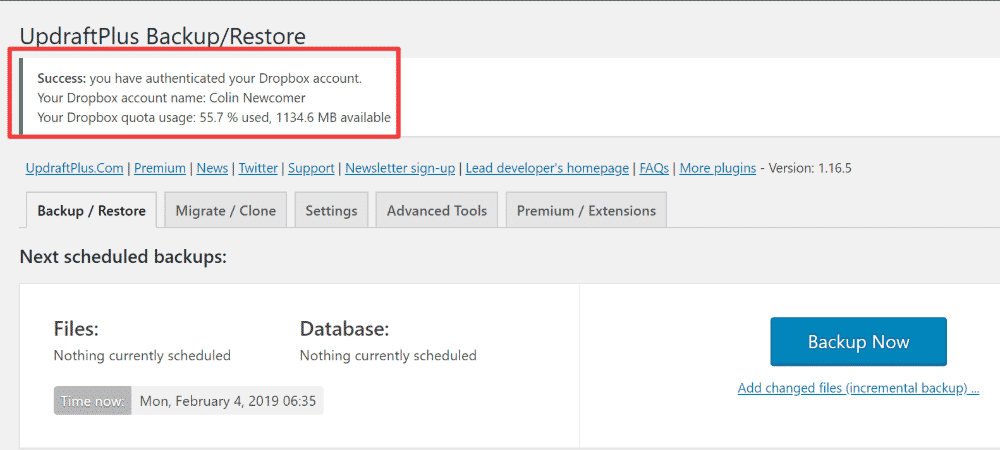
And that’s it! You should see a success message at the top of the UpdraftPlus interface in WordPress confirming that the plugin is now connected to Dropbox:
Now that you’ve automated storing your backups in a safe place, your next step is to create a schedule that the plugin will use to automatically back up your site for you.
For example, you can have UpdraftPlus automatically create a new backup every week (and upload that backup straight to Dropbox, of course).
To set up your schedule, go to the Settings tab again.
At the top, you’ll see two options:
You can then use the drop-downs to choose an automatic schedule from the available options:
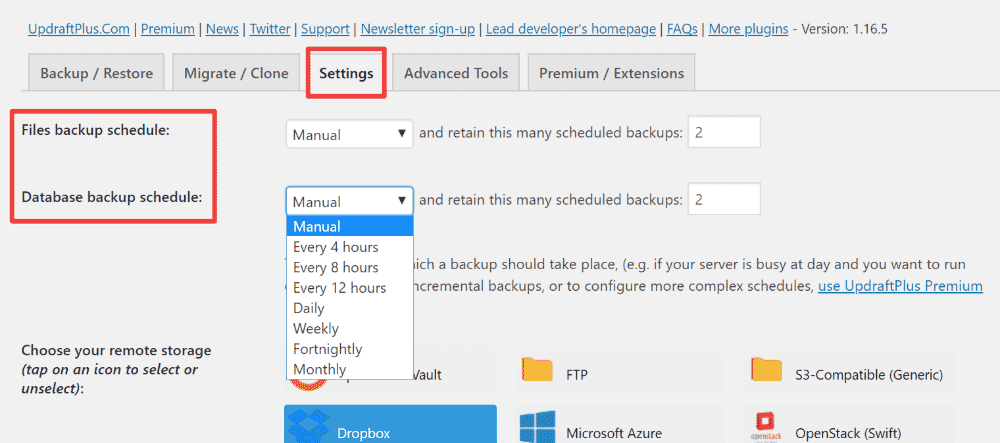
So…which frequency should you use?
Well, this really comes down to how frequently you make changes to your website.
For example, if you only publish a new blog post once per week, you don’t need to backup as often as if you were to publish a new blog post every day.
As a general rule, weekly is a good option for most sites, but consider moving to a daily schedule if you publish multiple posts per week.
Beyond that, you can also choose how many backups to retain. Once you exceed this number, UpdraftPlus will automatically delete older backups to make space for new ones.
The default – two – is a good option for most sites. You can increase the number if you want to be even safer, though:
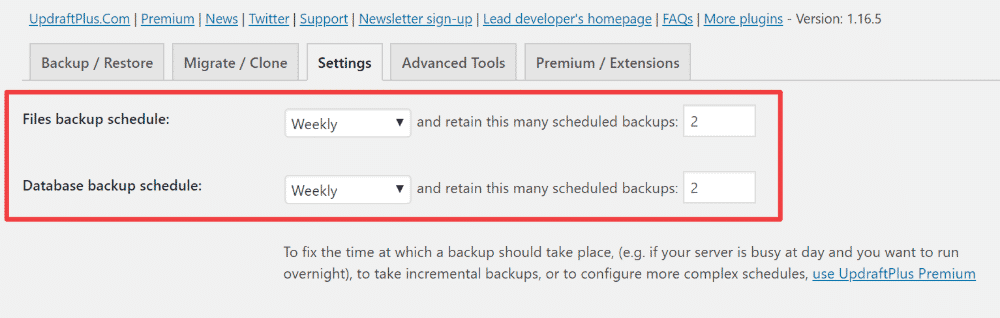
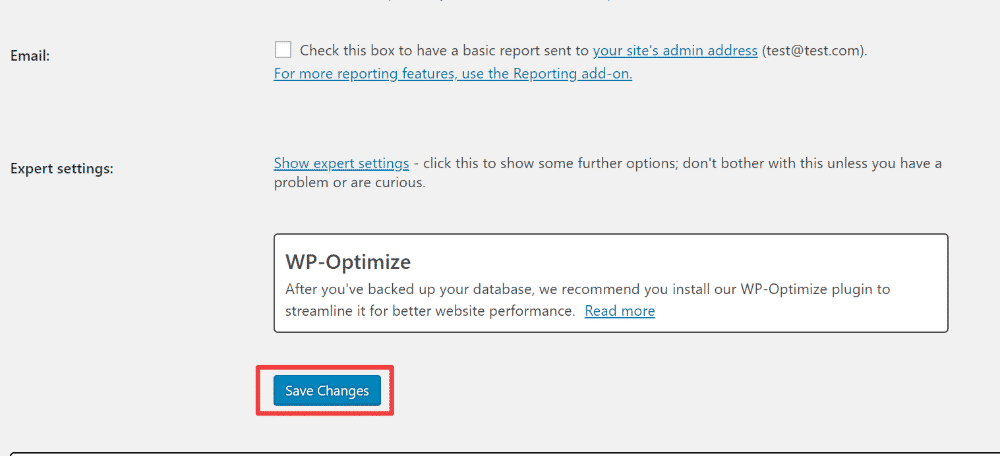
Once you’ve made your choices, make sure to click the Save Changes button at the bottom of the settings area.
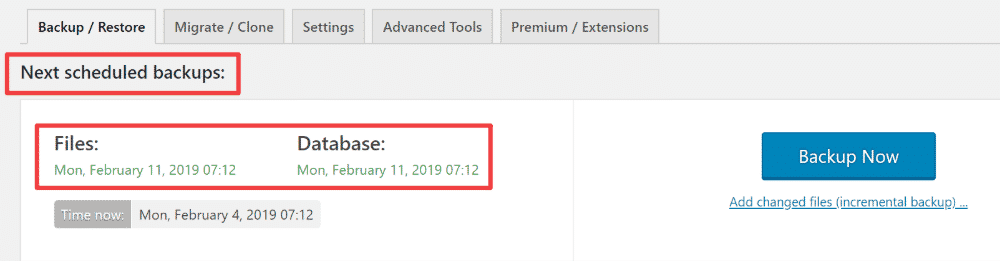
After you save your changes, you can go back to the Backup / Restore tab to see when your next scheduled backups are:
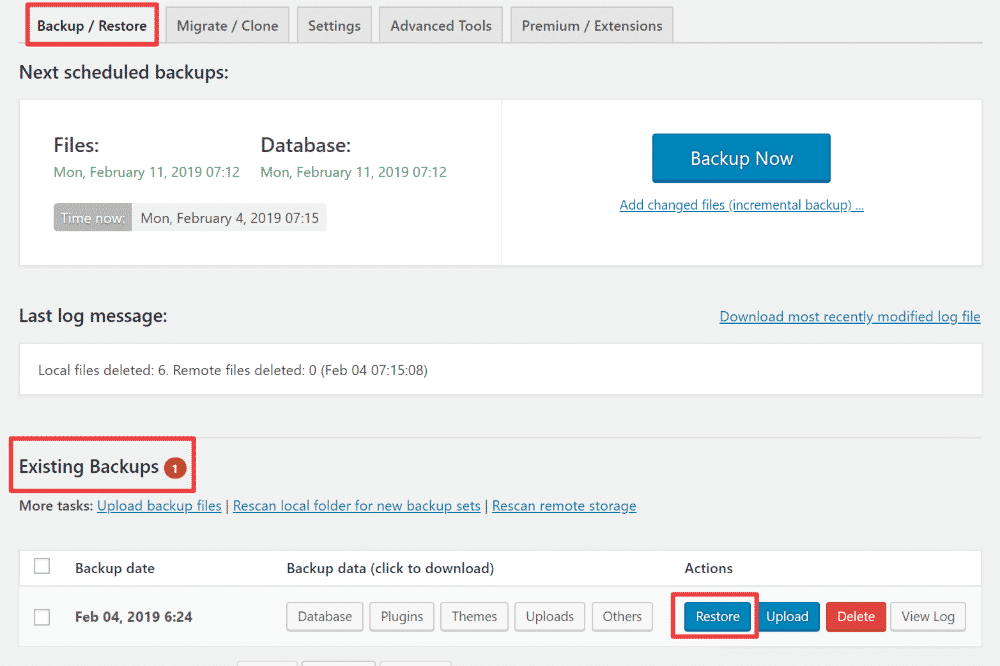
Hopefully, you never encounter an issue that requires you to use one of your backups. But if you do run into that situation, it’s good to know how to restore your WordPress site from a backup.
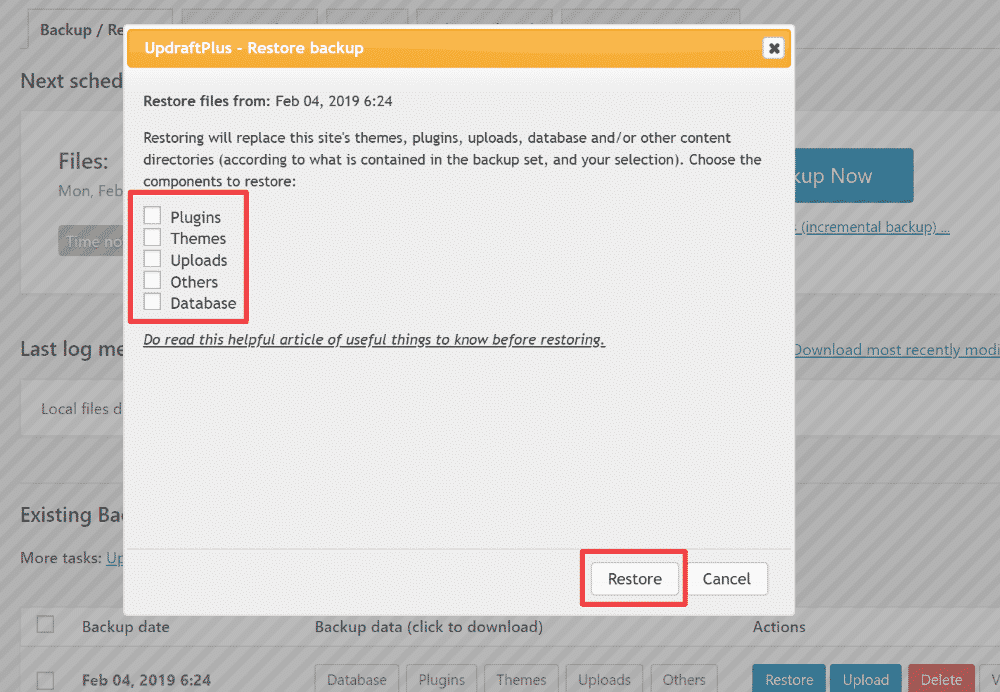
To restore from a recent backup, look for the Restore button next to the backup in the Existing Backups section:
Once you click that, it will open a popup where you can choose exactly what content to restore. To perform a complete restore of your site, you’ll want to check all of the boxes:
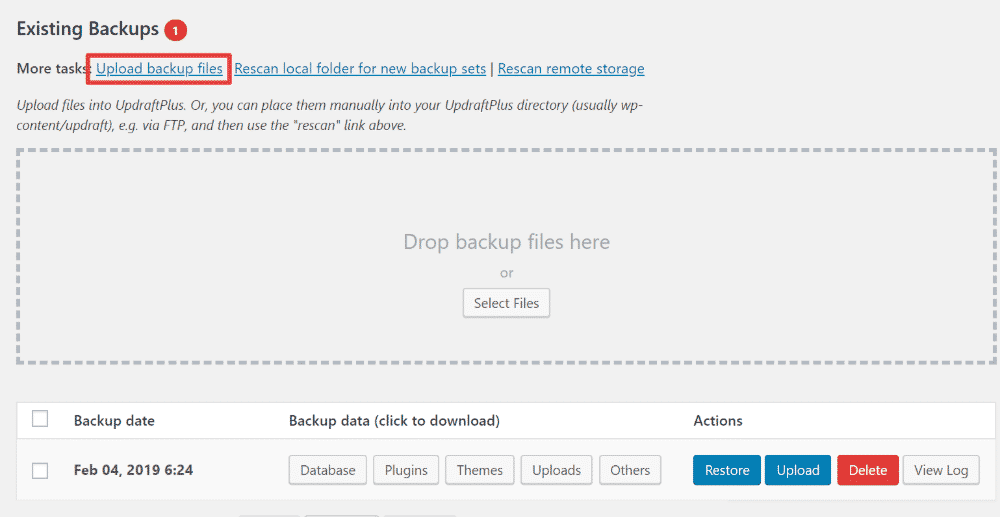
If you want to restore from an older backup on your local computer, you can also manually upload your backup files and then use the same process to restore from those files:
There you have it, folks! Now that you’ve set up UpdraftPlus, it will automatically backup your WordPress site to your remote storage service on the schedule that you chose.
That means your WordPress site’s data stays secure without you needing to lift a finger. Pretty cool, right?