

Do you get nervous when you have to change margins in your Google Docs document? Maybe you know how to set side margins, but you don’t know how to customize the top and bottom ones?
Don’t worry, as you’re not the only one who’s struggling with this. A lot of people panic when they have to change margins in a Google document, and they try to avoid it whenever they can.
However, there’s no need to fret! Margins shouldn’t scare you anymore. We know one straightforward and accurate way to customize all your margins.
In this article, we’ll guide you through the process and explain how to change margins in Google docs. Moreover, we’ll share some tips and tricks that will help you become a master of the margins, once and for all!
Effortlessly export your Google Docs to WordPress with just 1-click.
Get Started TodayWhen you open a new document and start writing, you’ll notice some space around your text. Just like most other writing programs, Google Docs leaves some empty space above, below and on the sides of your document. As you may have guessed, we’re talking about margins, and the default page margin in Google Docs should be 1”.
Of course, you can change the margins any way you want, to make it easier for you and those who read the document. However, in some situations, you have to follow specific rules. If you have to write an academic paper or your thesis, for example.
Some people may not understand the importance of margins, but there are two main reasons why we have to use them. First, when you print a document, they allow you to customize the distance between the edges of the paper and your text. We’re used to reading all kinds of materials on our screens, but when it comes to printed documents, certain rules still apply.
Secondly, when you send a document to your colleague or your boss, they can use the margins to insert a comment. They make business communication more comfortable and more productive.
Knowing how to change margins in your Google doc is essential as it allows you to customize your documents and seem more professional. There are two ways to do so. The first one is much faster, but it will enable you to change only the side margin. On the other hand, the second method takes more time, but you can use it to customize all margins at the same time.
You can use this method for editing both new or existing documents. Therefore, create a new document or open an old one and follow our guide:
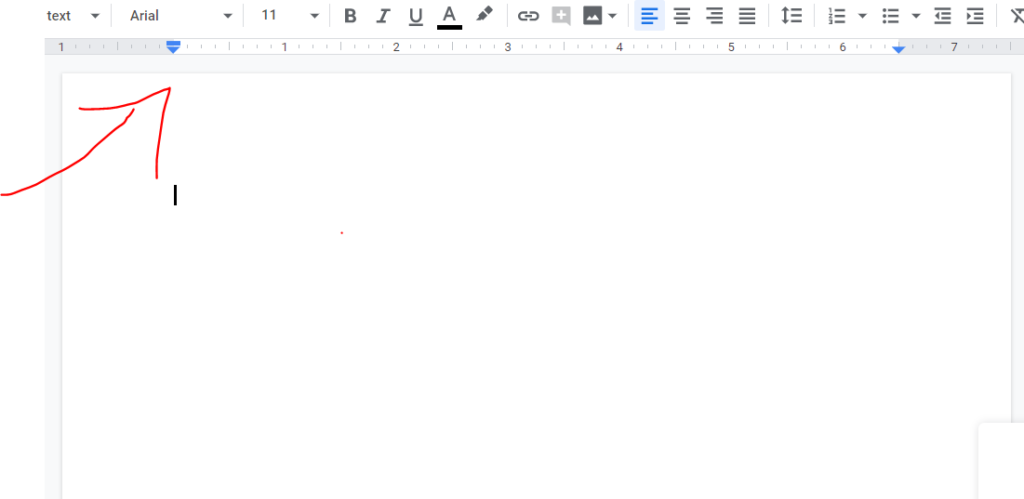
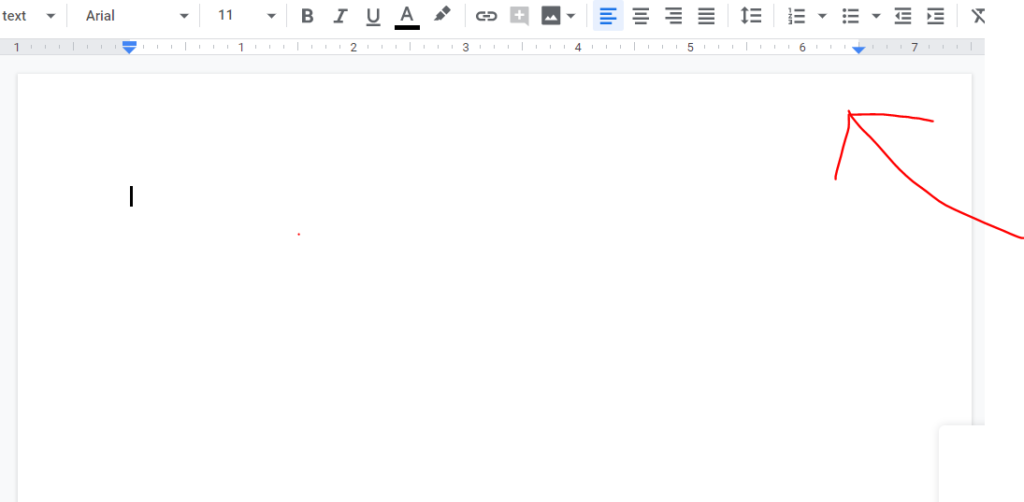
Of course, you can change both side margins, but you have to customize them one by one.
If you want to change all margins, you’ll have to do that through the Settings. Of course, you can use this method to customize only the top margin or the bottom margin, or maybe three out of four margins. Again, open a new or an existing document so that we can start.
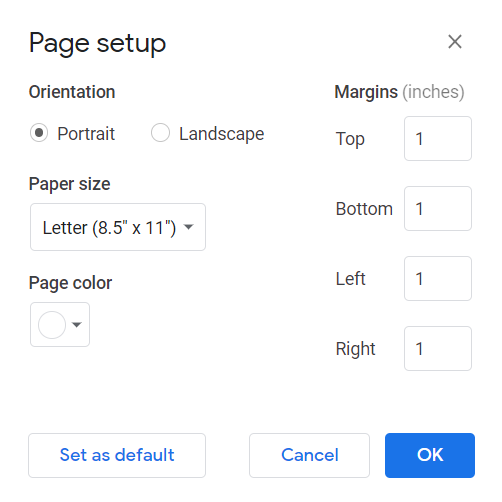
Depending on what metric system you’re using, your Google document’s default margins could be either 1” or 2.54 cm. All four margins (top, bottom, left and right) will be the same size unless you decide to change them.
It’s not only possible to change margins in Google Docs, but you can also set a new default size. All you have to do is change your margins the way we described. Then, in the final step, before you click on the OK sign, make sure to select the “Set as default” option.
There’s no strict rule, but many people consider margins under 0.1’’ too narrow. If you want to seem professional, you should try to keep your margins somewhere in between 0.1 and 1’’. If they’re smaller, your document may look overloaded with details and be difficult to read.
If you’re in a hurry, you may opt for changing margins with a ruler, as that’s the quickest way. However, if you want to be more precise, we suggest you change them by using Page Setup in Google Docs. Besides, this method allows you to change all four margins, unlike the ruler.
Unfortunately, it’s not possible to lock the margins in Google Docs. However, there’s a way to prevent other people from changing them. Before you share the document with someone, turn off the Edit option, and make sure that the only choices allowed are View and Comment.
Hopefully, this article has given you a better understanding about changing margins in your Google Doc. As you can see, there are two ways to do so, and everything depends on what you need to do. The best option could be to combine both methods: using a ruler when you need a quick fix, and using the Settings when you want to change all margins.
We hope that these tricks will save you time and help you to be more productive.