

Have you strained your hands/arms recently? Maybe you’re just tired of typing. People have been using speech-to-text on mobile phones for years now. But are you starting to wish that such a feature was present as a part of computer text editing apps?
You’re definitely not alone. There are people far and wide across the world who’d rather use their voice than type hundreds upon hundreds of words for their school assignments, work, or personal projects.
Fortunately, one of the most popular platforms for online text editing, Google Docs, introduced such a feature years ago.
In this article, we’re going to give you a step-by-step walkthrough on how to use voice typing in Google Docs. We’re also going to discuss the speech-to-text feature in general.
Effortlessly export your Google Docs to WordPress with just 1-click.
Get Started TodaySpeech-to-text is very simple to explain. Activate the function, say what you want typed, and the device/app that features such a tool will automatically type it all out for you. Every newer smartphone and tablet comes with built-in speech-to-text capabilities.
As many as 31% of Americans who own smartphones prefer text to phone conversations. Typing using your voice is much quicker and easier.
Google Docs’ Voice typing works in the exact same way as speech-to-text on smartphones. Of course, don’t expect the voice recognition software to be 100% accurate. You’re going to have to do some editing after “speaking” the text.
The primary focus group of the speech-to-text feature are people with disabilities. People who aren’t able to type or find it hard or mentally/physically painful.
But there are other reasons why someone might want to use Voice typing. We mentioned strains and injuries. Then, there’s the fact that you probably speak faster than you type. Therefore, you may want to use Google Docs’ Voice typing feature to relay a piece of writing and then proofread it for any potential miscommunications with the speech-to-text translator tool.
On the other hand, you might be jotting down quick notes in Google Docs. Speaking helps you avoid forgetting what you wanted to say in the spur of the moment.
If you like the idea of typing using your voice in Google Docs, you’re probably going to want to give it a go. Below is a detailed walkthrough to help you.
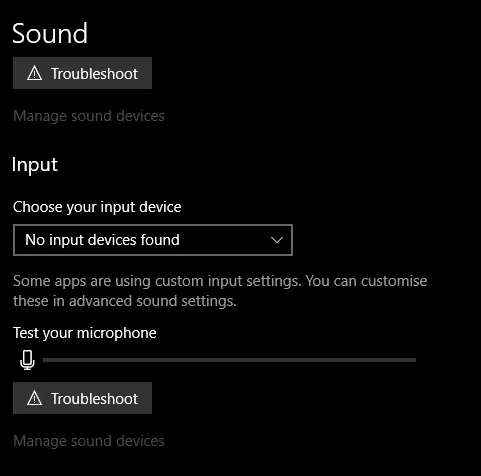
If you’re using a laptop, it probably has a built-in microphone intended for video chats. However, if you’re using a desktop PC, chances are that it isn’t equipped with one. Not to worry, every set of earbuds that comes with smartphones is also equipped with a microphone.
Plug it into your computer, and the mic is ready. Keep in mind, though, that the better the microphone device, the clearer it will pick up your voice, which will make Voice typing a much smoother experience.
Start the Google Docs file like you normally would. Navigate to the upper part of the screen and select Tools. From the dropdown menu, select Voice typing. Alternatively, you can use the Ctrl+Shift+S shortcut on your keyboard to do this.

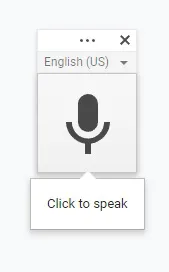
The first time you open the Voice typing feature, you’re probably going to be prompted to grant Google Docs access to your computer’s microphone. Go ahead and do it. The default language is English (US).
If you want to change the speech-to-text language, click the downward-facing arrow next to English (US) and select your preferred option from the list. Note that not all languages are available here.
Now, click the microphone icon in the Voice typing window. Grant permissions if asked. Speak and the words will automatically be typed in Google Docs.
Voice typing is a completely free feature available on Google Slides and Google Docs. It is not a third-party tool, but a proprietary and built-in function from Google.
Like the platform itself, Voice typing is absolutely free in all countries that have Google Docs support. Of course, like the platform itself, Voice typing is inaccessible without an internet connection.
Unfortunately, no MS Word iteration comes with a built-in speech-to-text feature. However, both Windows and macOS are equipped with one. On Windows, select Start, type in “windows speech recognition,” and hit Enter.
From there, set up the speech recognition feature and follow the instructions on how to use it. On macOS devices, go to the Apple menu, click System Preferences, and select Keyboard and Dictation. Turn the dictation feature and the Enhanced Dictation on.
Windows and Apple speech-to-text functions are compatible with any typing program and will work on Microsoft Word, as well.
In some instances, the Voice typing feature will be grayed out in Google Docs. This is most likely due to an outdated browser version. Uninstall it, go to your preferred browser’s website, download its latest version, and install it.
If the issue persists, it’s probably because the language that you’re currently using in Google Docs is unsupported. Go to File in Google Docs and select Language from the dropdown menu. Select English (US) and try using Voice typing.
Open your preferred browser, type in “google docs” in the search bar, and hit Enter. Follow the Google link. Alternatively, go to www.google.com/docs. Then, select Blank under Start a new document.
Google Docs are stored on Google Drive. Google Drive is one of the world’s safest cloud storage platforms. So, yes, Google Docs are completely safe.
We hope that we’ve provided you with all the necessary information for using the Voice typing feature in Google Docs. As you can see, it’s as simple as hitting Ctrl+Shift+S while in Google Docs and clicking the microphone function. Bear in mind, however, that your computer needs to have a functioning microphone to use Voice typing.