


If you’re wondering how to put a line in Google Docs, you can insert a horizontal divider, draw a dotted line, or use a table for vertical separators.
Whether you’re working on a report, proposal, blog draft, or client document, the right line can make the page feel more organized.
This guide covers horizontal lines, dotted lines, drawing-based lines, and custom dividers in Google Docs. It provides step-by-step instructions for each method.
Highlights
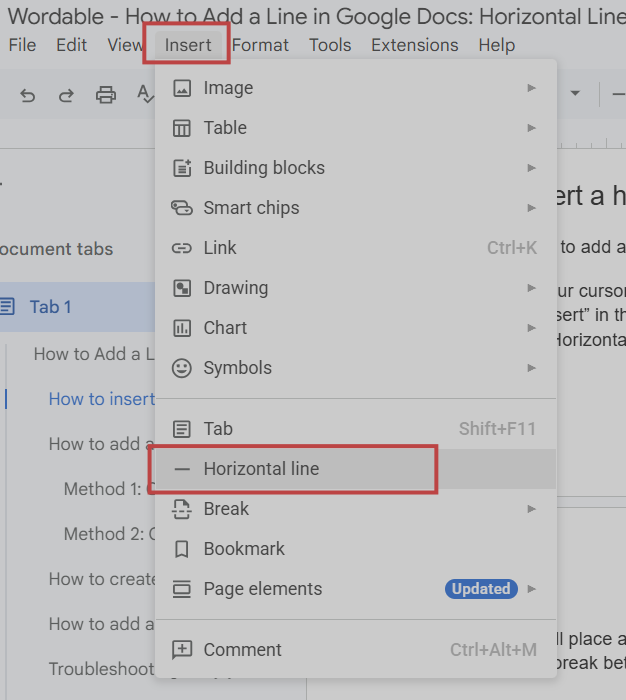
The fastest way to add a line is to use Google Docs’ built-in horizontal line tool.
Screenshot provided by author
Google Docs will place a full-width line on its own row, creating a clear break between the content above and below it. For more formatting options, see Wordable’s guide to Google Docs for content creators.
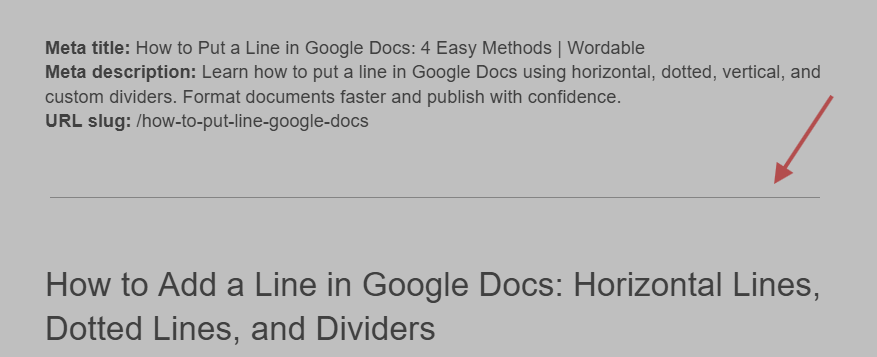
Screenshot provided by author
Horizontal lines work well when you want to:
For example, you might place one between major sections of a blog post, before a new chapter in a report, or between different parts of a proposal.
For blog drafts, Wordable’s guide on how to use Google Docs for blogging covers related document-formatting practices.
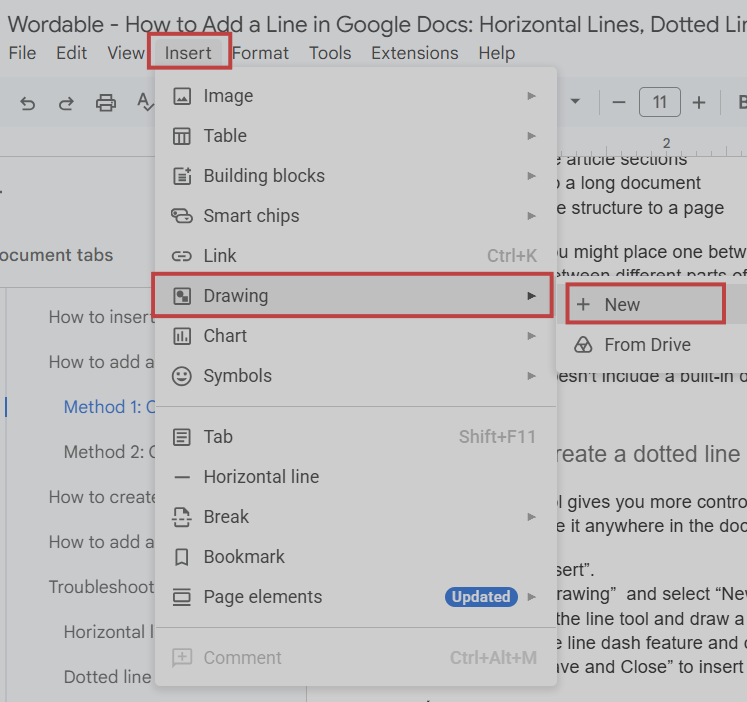
The Insert menu doesn’t offer a dotted horizontal line option, but you can create one using the drawing tool or a dotted table border.
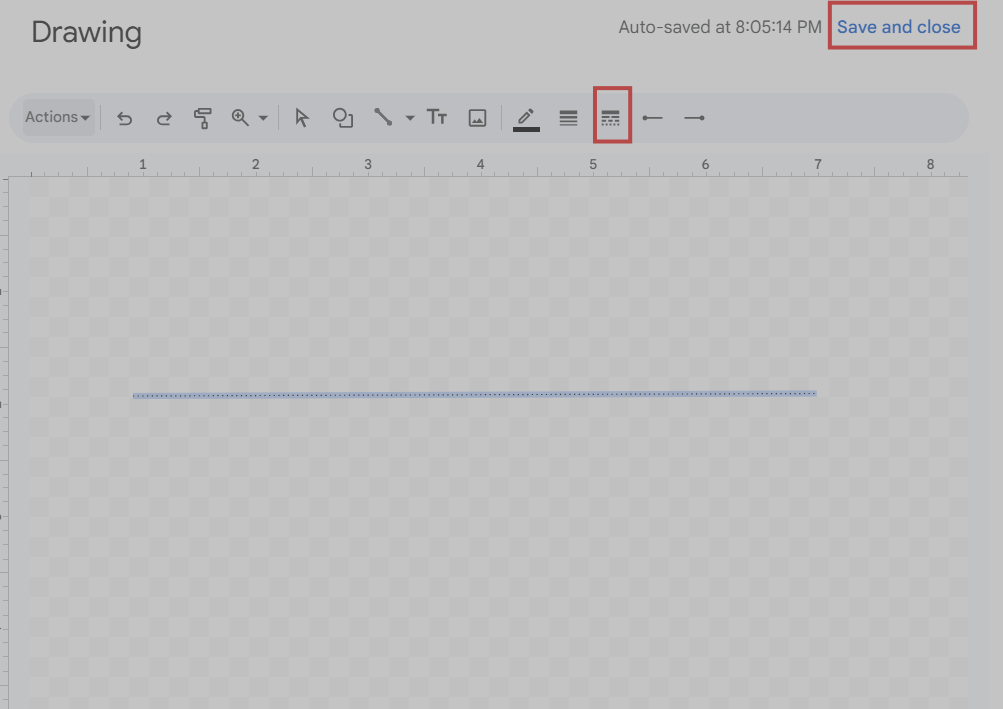
The drawing tool gives you more control over how your dotted line looks. You can create a divider and place it anywhere in the document.
Screenshot provided by author
Screenshot provided by author
This method works well, for example, when you want to separate two content blocks in a report.
For a dotted signature line, insert a one-cell table where the signature should appear. Select the bottom border and choose a dotted option under Border dash. Set the remaining borders to 0 pt, then adjust the cell width to fit the signature area.
If the standard horizontal line feels too plain, use the drawing tool to create a custom divider that matches your document.
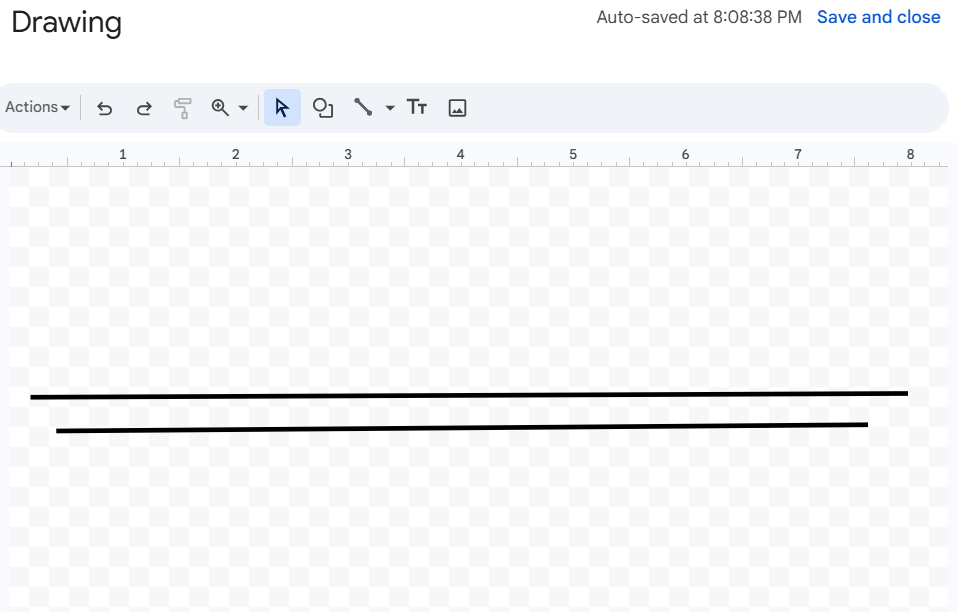
Screenshot provided by author
You might use:
Custom dividers work well in reports, proposals, and branded documents where you want more control over how different sections appear on the page.
To apply consistent formatting throughout a document, see Wordable’s guide to customizing styles and Google Docs templates.
Here’s how you can create a vertical line in Google Docs with a table.
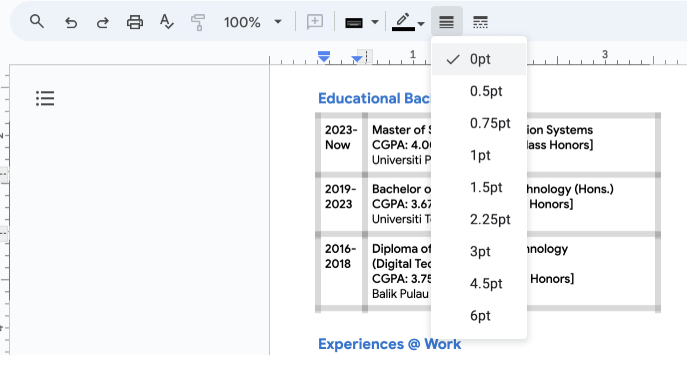
This approach works well when you want to separate content into distinct areas on the same page. For example, you might use a vertical line between two sections of a proposal or report.
You can also create a vertical line with the drawing tool. Draw a straight line, rotate it into a vertical position if needed, then insert it into your document.
Most line issues come down to spacing, display settings, or document edits. Here are a few common problems and how to fix them.
A horizontal line can look cramped when it doesn’t have enough space around it. This often happens after adding or removing content.
To fix it, add extra spacing before or after the line. You can also press Enter above or below it to create more separation between sections.
Sometimes a dotted line appears uneven or doesn’t look as expected. This can happen if you haven’t applied the line style correctly.
Open the drawing tool and check the line style settings. If the issue remains, create a new dotted line and insert it again.
If lines shift after you transfer content from Google Docs to WordPress, Wordable can help preserve document formatting during publishing. It lets you export your Google Doc draft directly to WordPress.
Formatting can also require attention when you move a finished document into WordPress. Wordable helps streamline that process by exporting Google Docs content directly to WordPress while retaining document formatting.
If lines shift after you transfer content from Google Docs to WordPress, Wordable can help preserve document formatting during publishing. It lets you export your Google Doc draft directly to WordPress.

Whether you need a simple horizontal divider, a dotted signature line, or a custom separator, Google Docs provides several ways to organize your document. Choose the method that gives you the formatting control you need.
Once your document is formatted, the next step may be publishing it. If you’re moving a Google Docs draft to WordPress, Wordable lets you export it directly without manually copying and pasting the content. Try Wordable today.
Place your cursor where you want the line to appear, then click “Insert” and go to “Horizontal line”. Google Docs will add a full-width divider on its own. This is the fastest way to separate sections and create a cleaner document layout.
Yes. You can create a dotted line with the drawing tool by changing the line style to a dotted pattern. You can also use tables, borders, or underscores when you need a dotted divider or signature line.
You can create a signature line with a dotted line, a table border, or a series of underscores. Tables and borders often give the cleanest result, especially for forms, agreements, or documents that require signatures.