
The WordPress admin page is the private area where you’ll manage important aspects of your WordPress site, like creating new content, installing plugins, moderating comments, and a lot more.
If you want to get the most from your WordPress site, you’re going to need to learn how to use the WordPress admin page.
But don’t worry – you don’t have to learn all by yourself!
In this article, we’re going to help you master this essential area of your WordPress site by showing you:
Let’s get started…
You can access the WordPress admin area by appending “/wp-admin” to the end of your domain name.
For example, if your site is https://yourdomain.com/, then you could access the WordPress admin page by going to https://yourdomain.com/wp-admin.
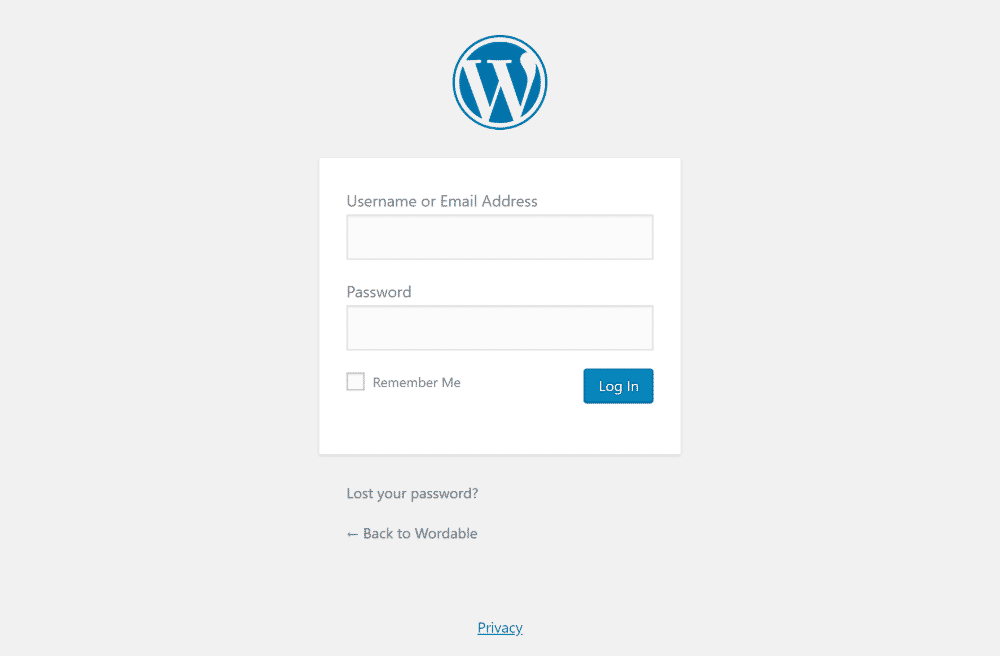
Once you visit that page, you’ll see a prompt to log in with a username/email and password:
If you’re not sure what your username and password are, here’s a quick reminder to help jog your memory…
Normally, when you install the WordPress software at your host, it will prompt you to enter your desired account credentials when you go through the install wizard. Those are the credentials you want to use here (not the credentials you use to log in to your hosting dashboard).
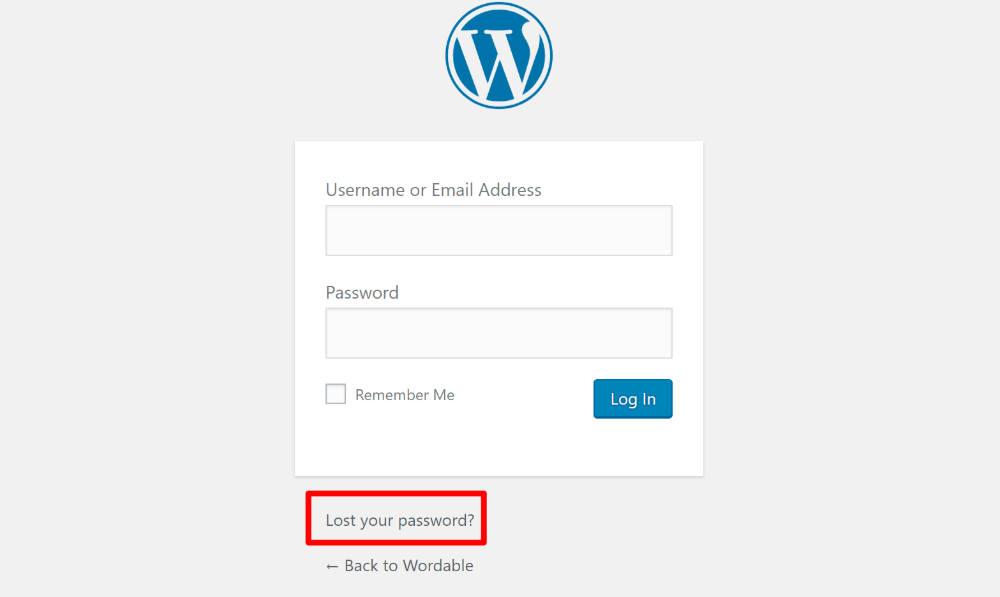
If that’s still not jogging your memory, WordPress also includes a built-in password recovery feature that you can access underneath the login form:
If you’re not sure which email is associated with your WordPress account, your next best bet is to reach out to your host’s support – they should be able to help you get back in.
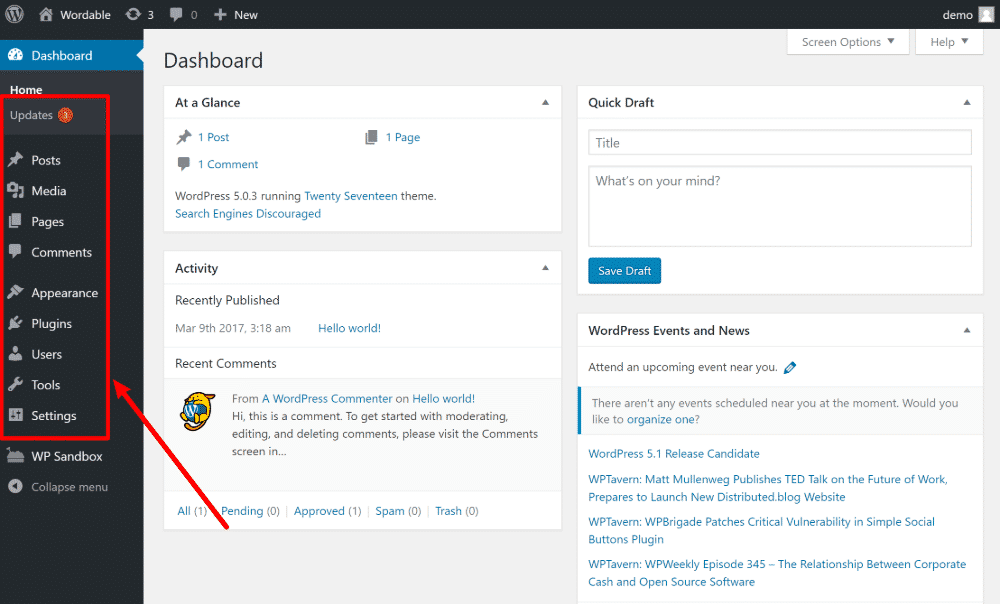
When you first log into the WordPress admin page, you’ll land in your Dashboard.
The Dashboard gives you a high-level look at some important information on your site, but it’s not where you’ll spend most of your time. Instead, you’ll mostly work in the areas that are listed in the menu on the left:
Here’s what those various menus do:
Let’s take a deeper look at each one of those areas.
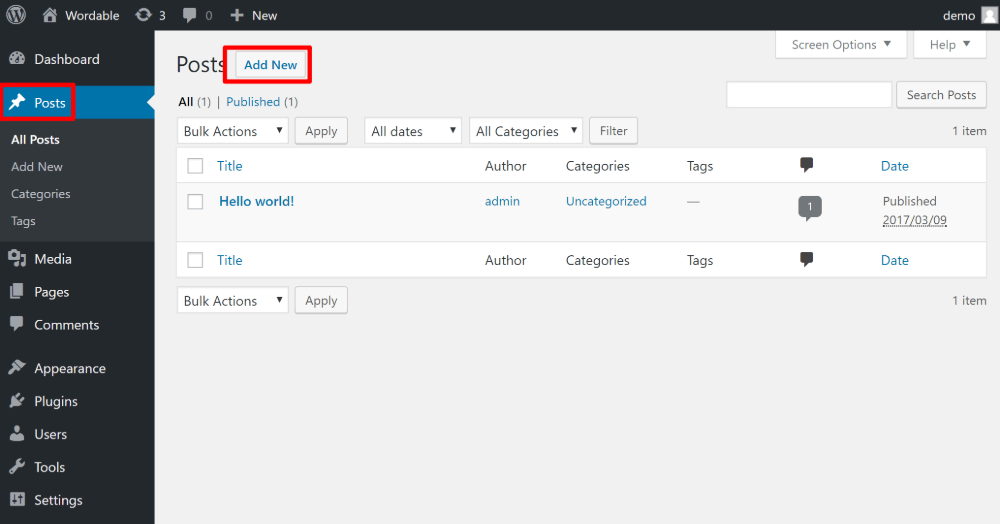
We’ll lump the Posts and Pages menus together because they’re pretty much identical.
When you click on the main menu item, you’ll see a list of all your posts or pages. To create a new post or page, you can click the Add New button:
That will launch the WordPress block editor, where you can add your content:
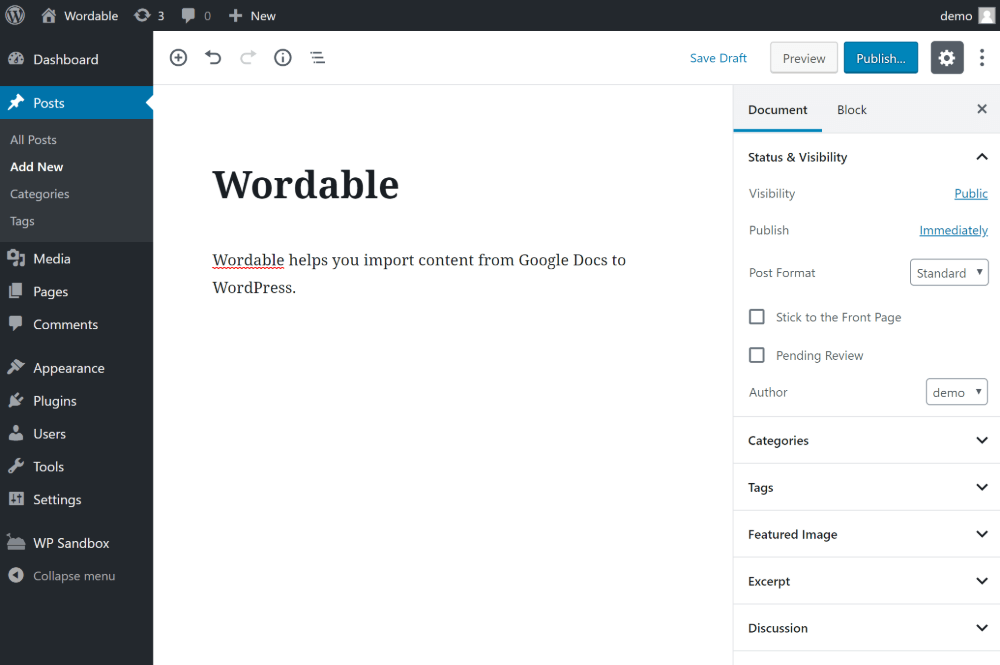
If you’d like to learn how to get the most from this editor, check out our detailed guide to the WordPress block editor.
As an alternative to using this editor, you can also use Wordable to write your content in Google Docs and then import your content to WordPress with the click of a button. Once you use Wordable to import your content, your content will show up in the same list – just as if you’d created it with WordPress from scratch.
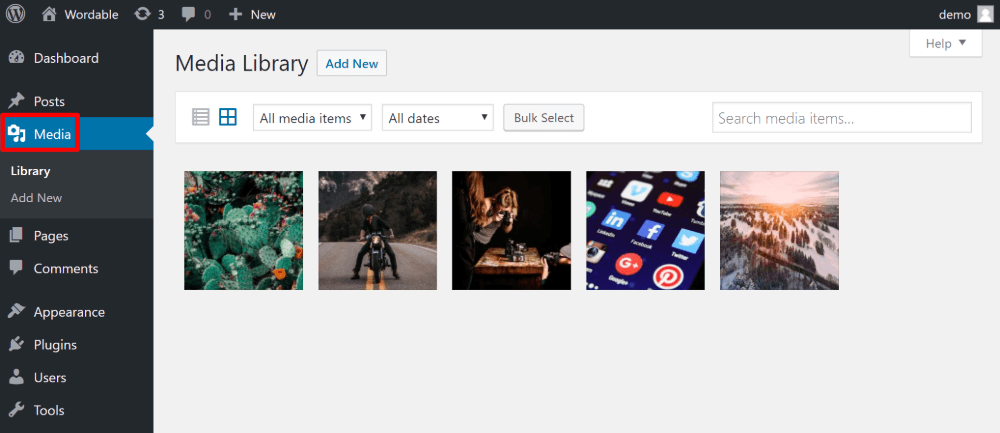
The Media menu item shows you all the files that you’ve uploaded to your site. You can also access this media library from the WordPress editor when you create new posts or pages, so you probably won’t use the Media area very often.
However, it can still be helpful if you need to find a certain file, and it also lets you upload new files:
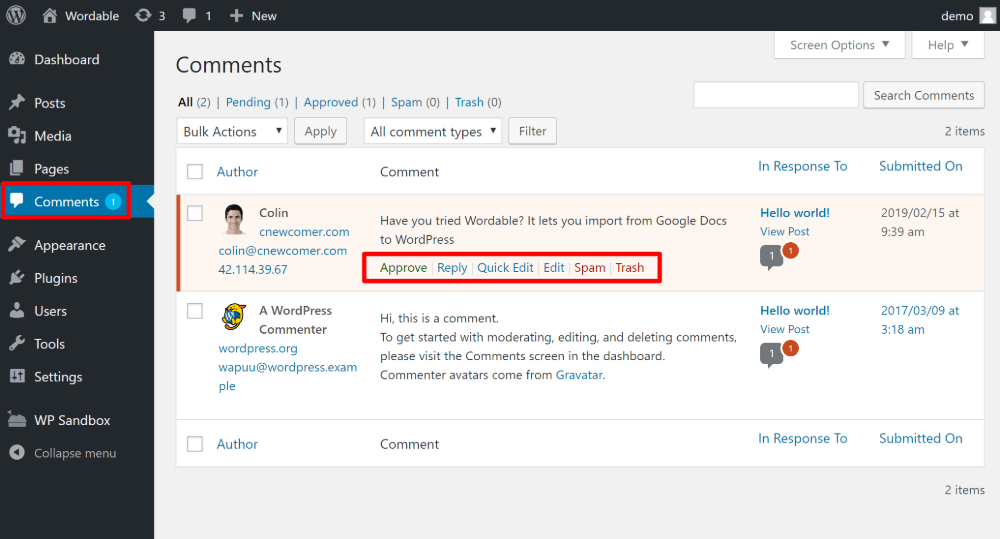
If you have a popular site, you’ll work in the Comments area on a regular basis.
This area lets you see all of the comments at your site. By default, you’ll need to manually approve new comments before they show up on your public site, so it’s a good idea to check in here every so often to sort through recent comments.
Beyond approving comments, you can also:
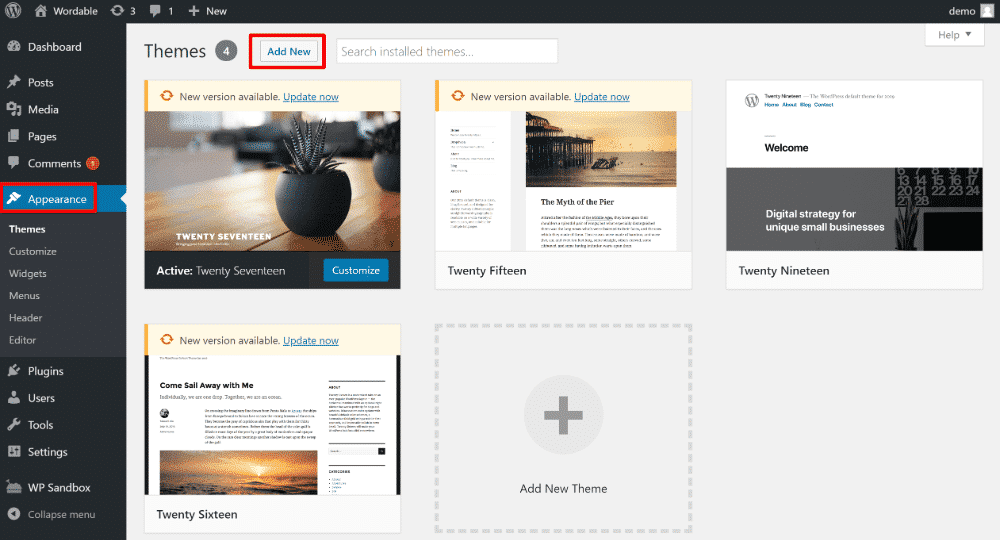
The Appearance menu area is another important area that you’ll definitely want to investigate.
This area lets you perform a few essential actions…
First, you can choose your theme and/or install a new theme by clicking Add New:
Once you’ve chosen your theme, you can access the WordPress Customizer by clicking on the Customize sub-menu.
This interface lets you tweak how your chosen theme looks. For example, you can change up colors, choose layouts, etc.
It’s really simple – you get human-friendly options on the left, and a real-time preview of your site on the right:
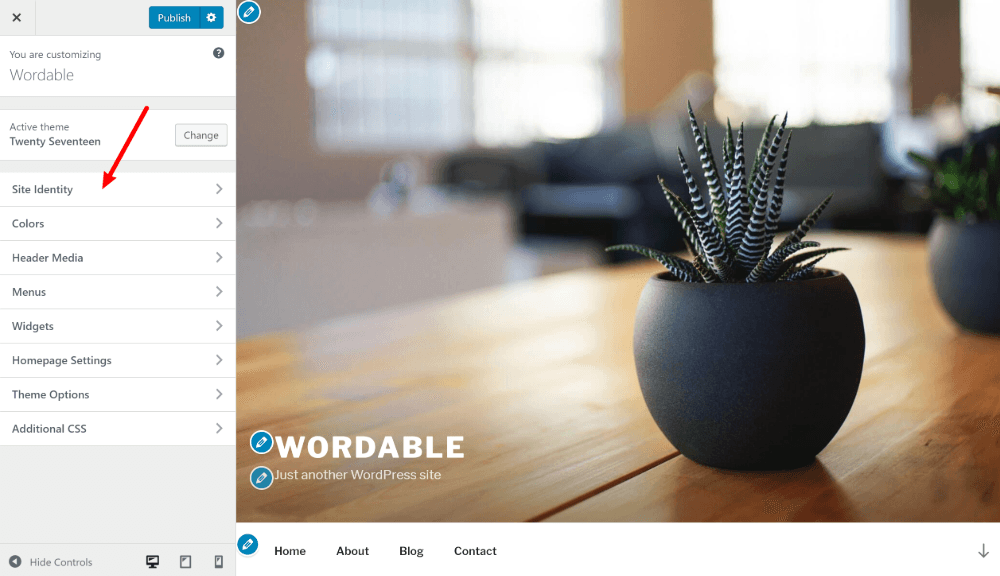
The WordPress Customizer also lets you configure:
You can also find dedicated areas for widgets and menus as sub-menus under Appearance.
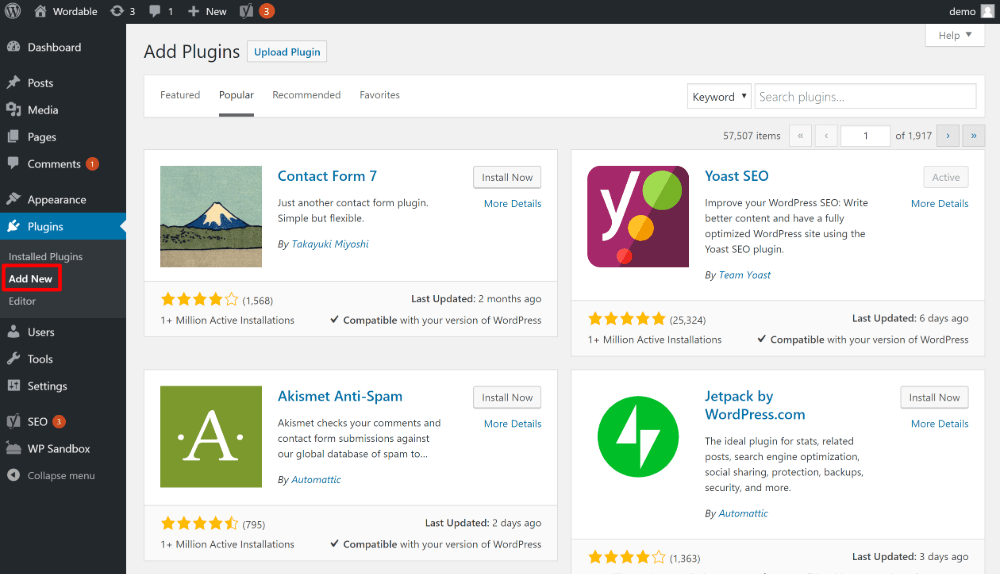
The Plugins area is where you’ll manage all of the plugins that you use to extend your WordPress site.
If you go to Plugins → Add New, you can install new plugins, either by searching WordPress.org or uploading your own ZIP file:
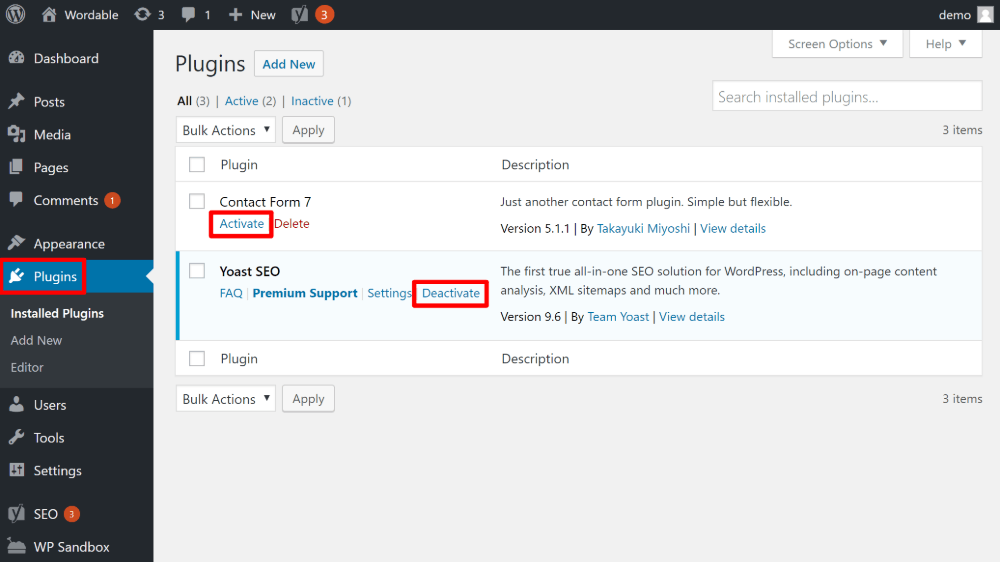
Then, once you’ve installed some plugins, you can manage those plugins from the main Plugins area:
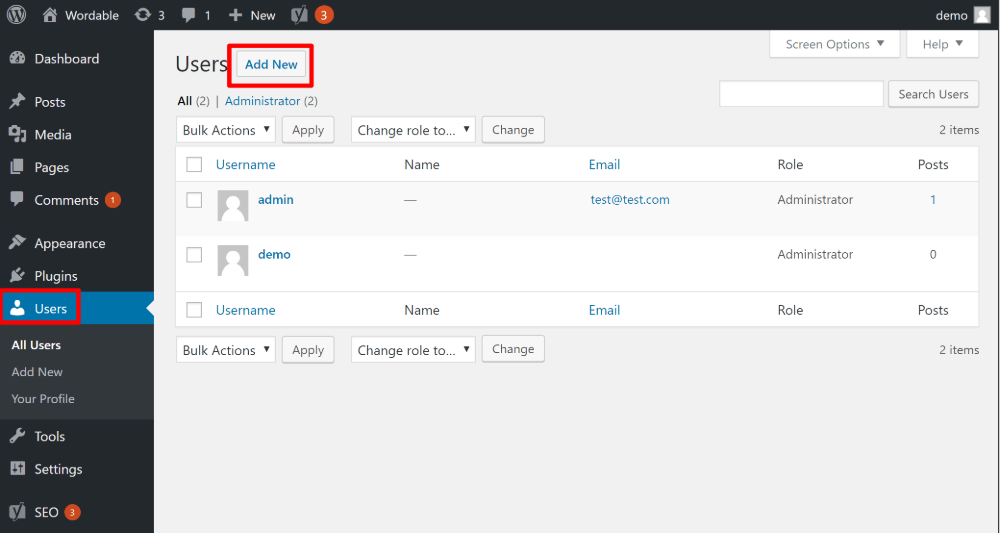
You probably won’t use the Users area that often. But if you do plan to add other users to your site – like giving a writer access to publish their own posts – you’ll do that from the Users area.
In the main Users area, you can:
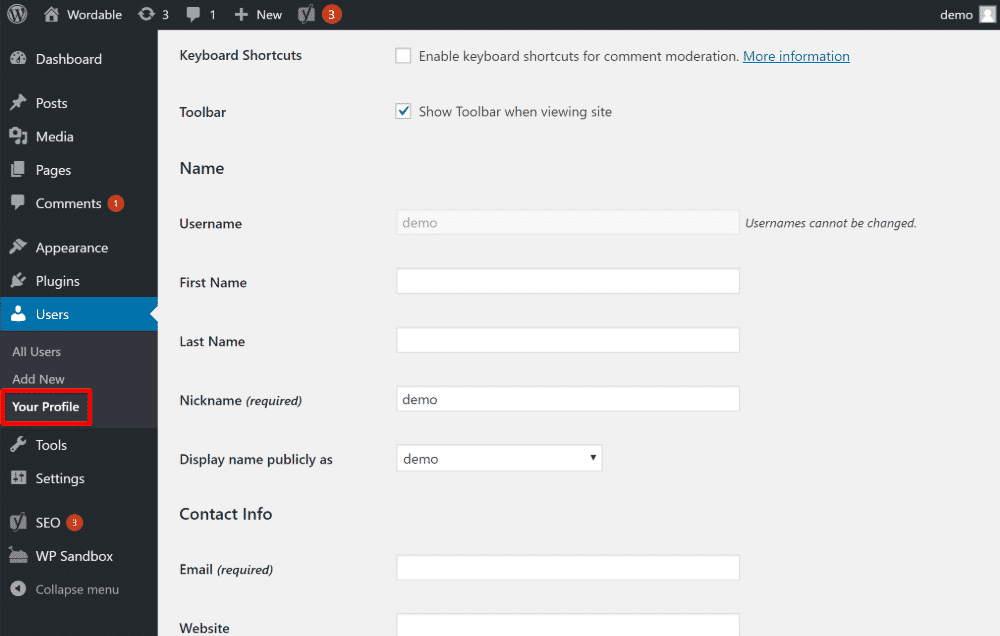
And if you want to edit your own profile, you can do that by going to Users → Your Profile. Some useful things you can do here are:
You’ll rarely use the default Tools area. But if you’re wondering what’s there, it lets you:
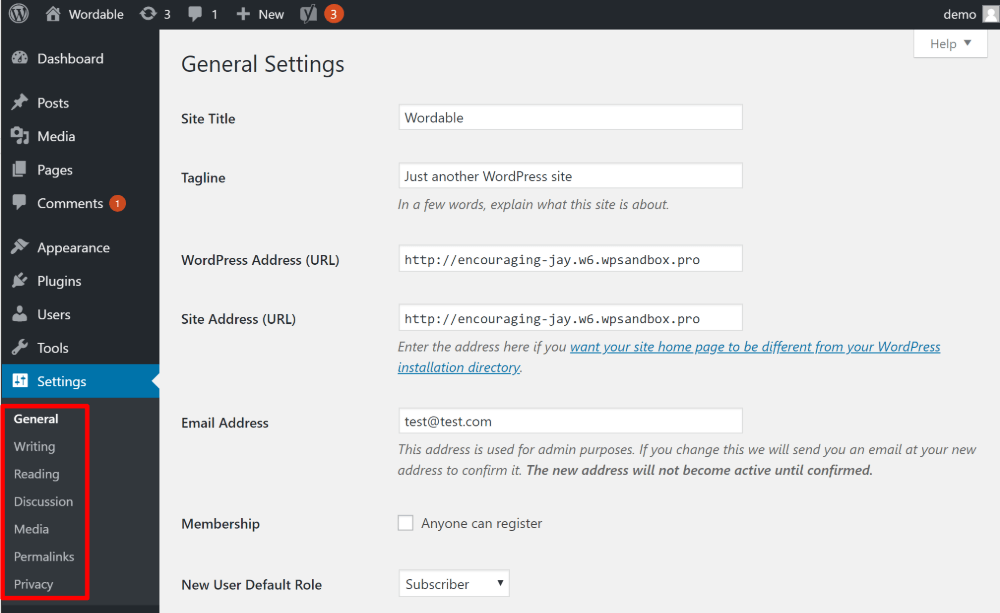
The Settings area contains several important sub-menus that control various aspects of how your site works.
Finally, the last important dashboard area is the Updates area, which you can access by going to Dashboard → Updates:
This area tells you whether you need to update:
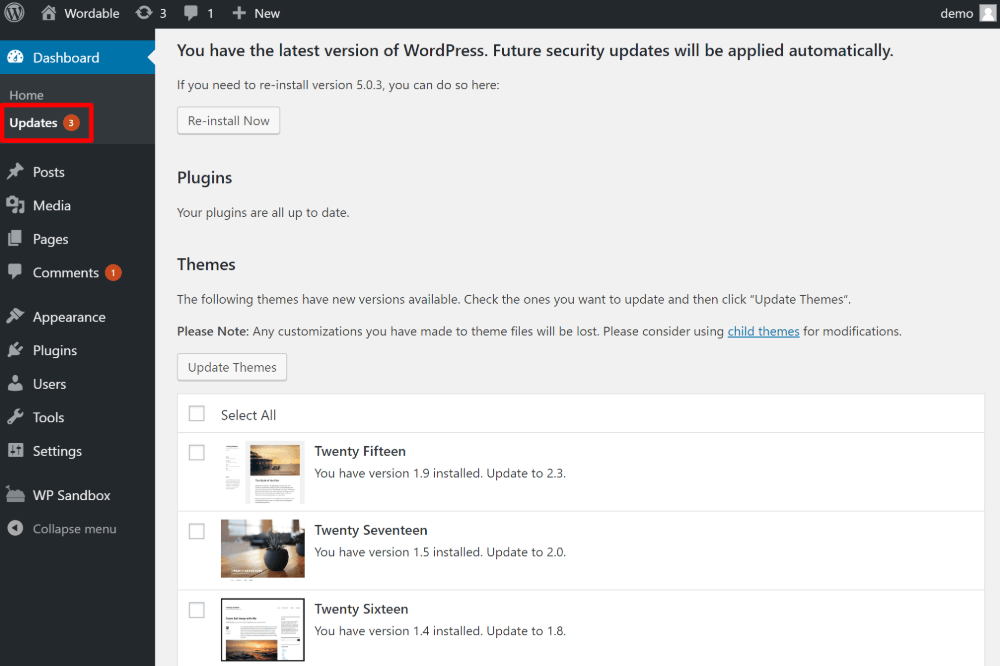
It’s essential that you keep your software updated, so you’ll definitely want to pay attention to this area.
Beyond alerting you to new updates, you can also quickly apply those updates with a few clicks.
Above, we showed you all of the WordPress admin page options that come with the default WordPress software.
However, it’s unlikely that these are the only dashboard areas that you’ll use.
See, that’s because the plugins and theme that you install will also add their own WordPress admin menu items.
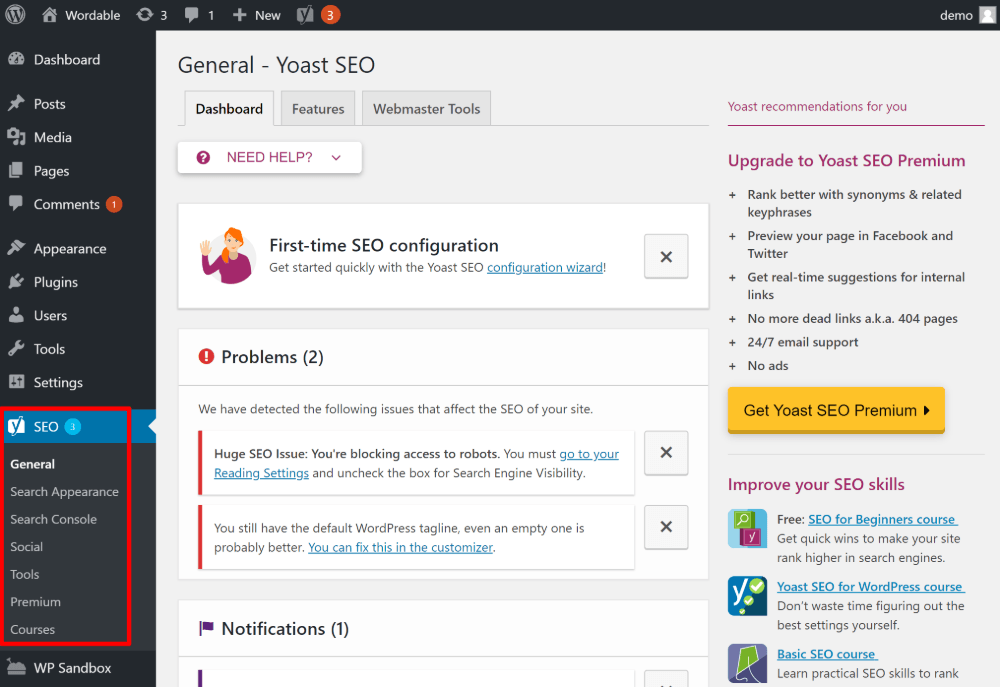
For example, you can see how the popular Yoast SEO plugin adds its own SEO menu area that lets you control important SEO settings:
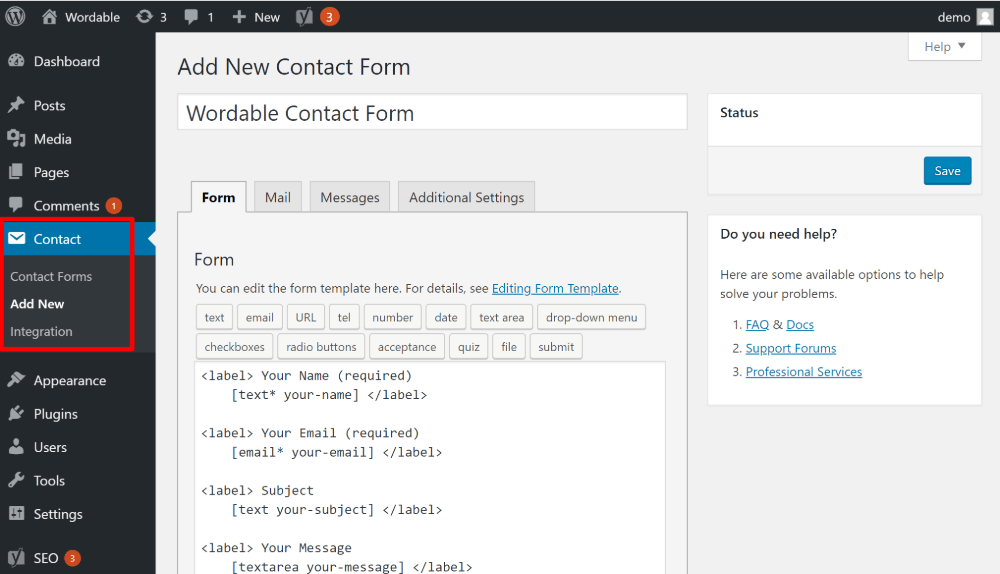
Similarly, the Contact Form 7 plugin adds its own Contact area that lets you create new contact forms:
Beyond that, many plugins will add their own sub-menu items to the existing menus. The most common situations are plugins appearing as sub-menu items under the main Settings or Tools menus.
As you install more and more plugins, your WordPress admin page can start to get a little cluttered.
To help you address that, let’s finish this post out with some ways that you can customize the WordPress admin page to help you work more productively.
There are two ways that you can customize your WordPress admin dashboards.
First, you can take advantage of WordPress’ built-in tools to help you customize the interface.
Then, if that’s not enough, you can also find plenty of plugins to help you customize things further.
The most helpful native option to customize the WordPress admin page is the Screen Options area.
Almost every dashboard area has a Screen Options toggle in the top-right corner:
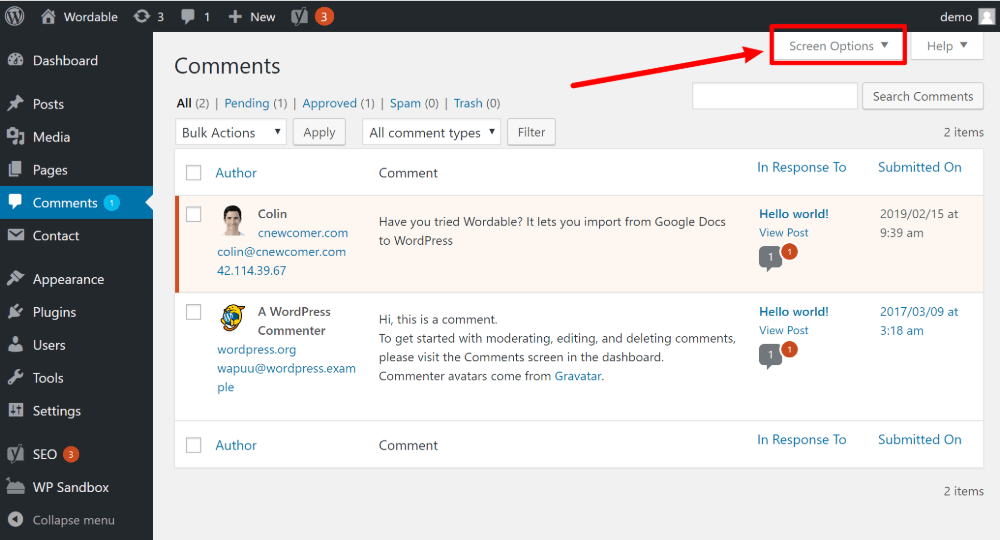
If you click this, it will expand a set of options that let you control that specific screen.
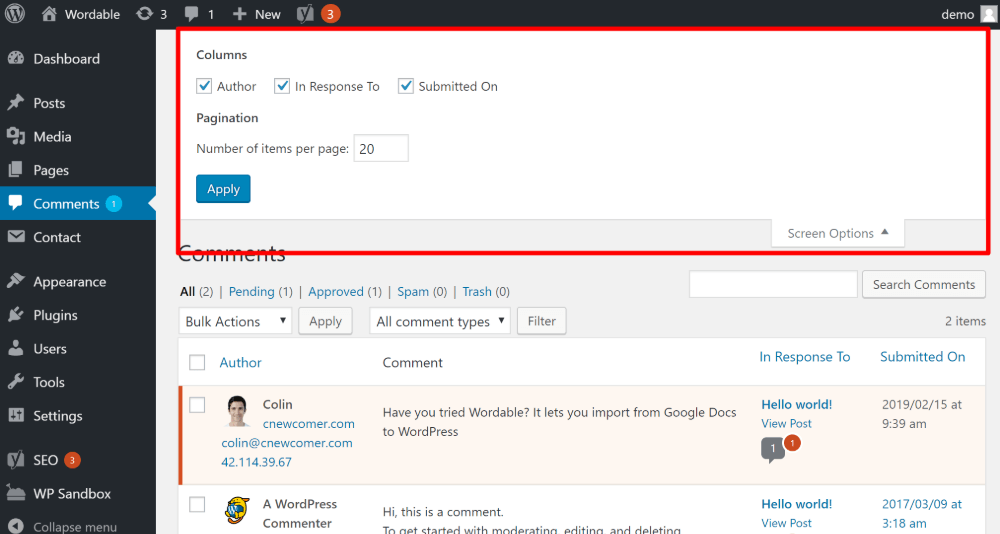
For example, the Screen Options in the Comments area let you choose:
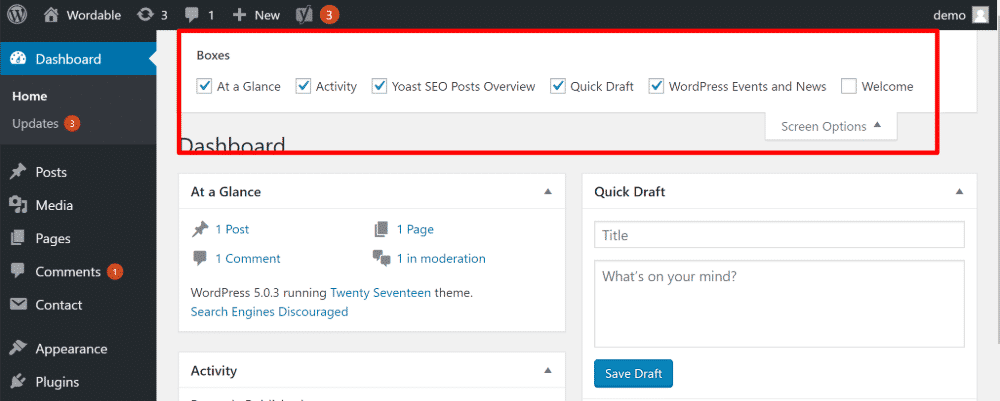
However, if you go to the main Dashboard area, you’ll instead get options to control which “boxes” to display in your dashboard:
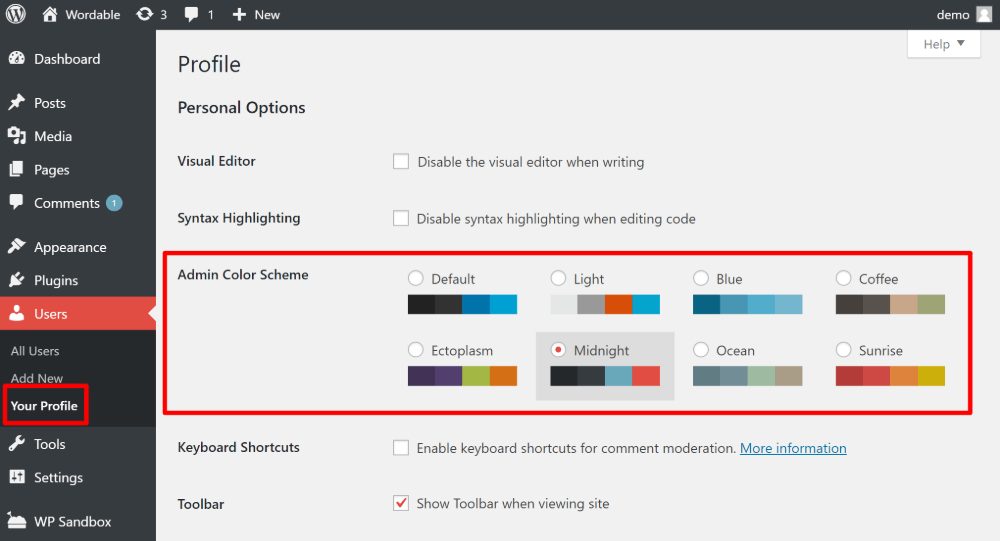
Beyond the Screen Options, you can also change up the colors of your dashboard by choosing a new Admin Color Scheme from your user profile area (Users → Your Profile):
Beyond the native options, there are also a variety of free and premium plugins that can help you customize your WordPress admin page.
Here are some great options to help you get started:
The WordPress admin page is where you’ll manage your site on a day-to-day basis, so it’s important to get a grasp on everything that it helps you do.
When you first set up your site, you’ll want to go through all the different sub-menus in the Settings area to configure import basics.
Then, once your site is more established, you’ll spend more time in the Posts, Pages, and Comments areas.
Finally – remember to check the Updates area on a regular basis to keep your site safe and secure with the latest versions of all your favorite tools.
And that’s it – have fun!
I saved 3 hours uploading this post from Google Docs to WordPress using Wordable.