

It’s 11 PM, and you’re about to share a Google Doc containing the entire next quarter’s content strategy with a new freelance writer. As your cursor hovers over the “Share” button, a wave of anxiety hits you.
Is this secure?
Who else can see this?
Could this link get forwarded and end up in a competitor’s hands?
In today’s fast-paced marketing and SEO world, Google Docs is our command center for real-time collaboration. But this convenience comes with a risk. This guide is here to change that. We’ll demystify Google Docs sharing, giving you the confidence to collaborate freely while keeping your valuable content locked down.
By the end of this post, you’ll know exactly how to use every sharing permission, avoid common security risks, and turn Google Docs into a secure fortress for your team’s best work.
Mismanaged Google Docs sharing is risky. It can lead to data leaks and even to a full-blown data breach. According to SentinelOne’s 10 Cyber Security Trends For 2025 report, one of the key trends this year is insider threats amplified by hybrid work, precisely because of using tools like Google Docs:
“Though employees may not intend to, when they misconfigure sharing links for cloud-based collaboration tools, they can expose sensitive files.”
With the average cost of a data breach in 2025 at $4.4 million, it’s clear everyone needs to take this seriously (Source IBM).
In addition to adjusting sharing permissions, organizations should implement application containment practices — isolating document access environments and limiting lateral movement within IT systems — to ensure that even if a shared doc’s access is misconfigured, sensitive internal resources remain protected from broader exposure.
But it’s not just about cybersecurity. Your team’s efficiency and productivity can also suffer. For example, granting editing permissions to the wrong person can lead to inadvertent changes in a document, which may then require additional revisions, disrupting the team’s workflow and adding costs to your content operations.
To prevent costly issues like those mentioned above, you must manage access levels and configure Google Docs sharing correctly. But before you can share with confidence, you have to understand the options.
(Image provided by author)
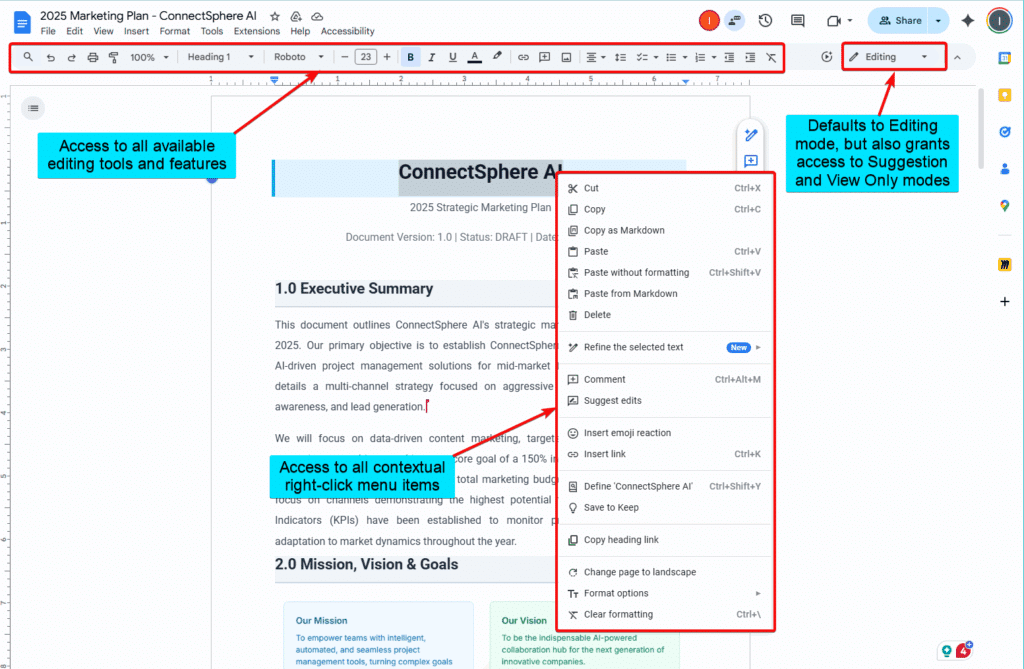
Google Docs offers three core permission levels, or roles, that dictate what a person can do with your document:
Think of these roles not as simple labels, but as specific job descriptions for your collaborators. Choosing the right one for the right person is your first line of defense in secure file sharing. This section highlights what these roles look like from the perspective of the user you assign them to.
The Viewer role is the most restrictive. A person with Viewer access can read the document and see all its content, but they can’t make any changes or leave comments. It’s a read-only permission level.
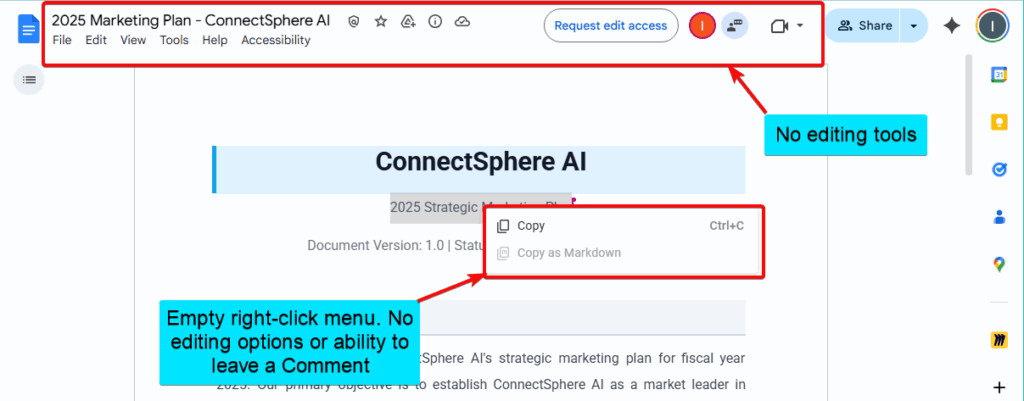
(Image provided by author)
This is the perfect choice when you need to share final, approved information without the risk of accidental edits.
Some example use cases include:
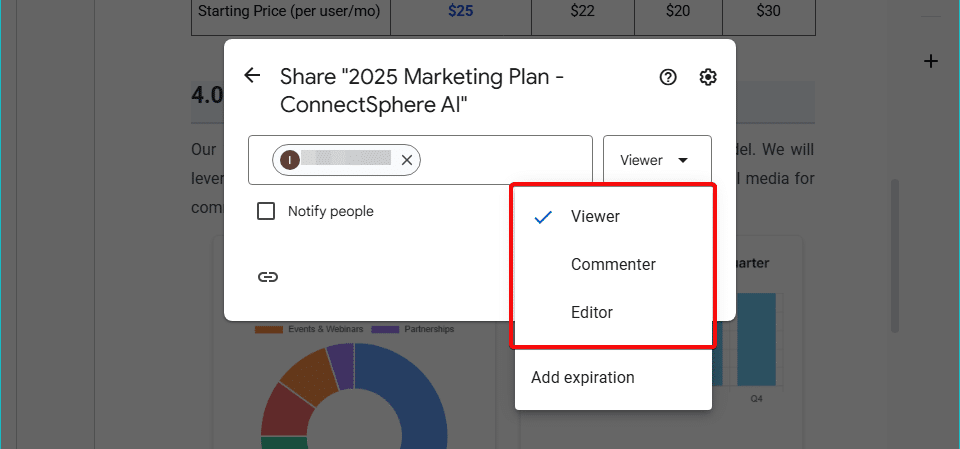
The Commenter role enables users to view the document and leave comments or suggestions without directly modifying the original text. When they log in and access the document, Google Docs defaults to Suggestion mode:
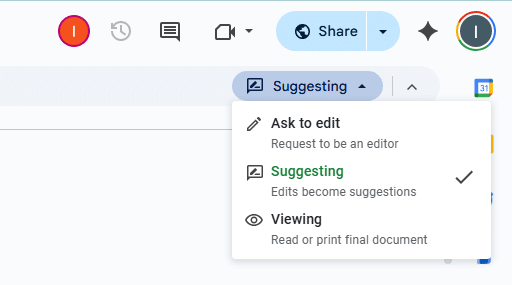
(Image provided by author)
When a Commenter makes a suggestion, it appears as a tracked change that the file owner or an Editor can approve or reject.
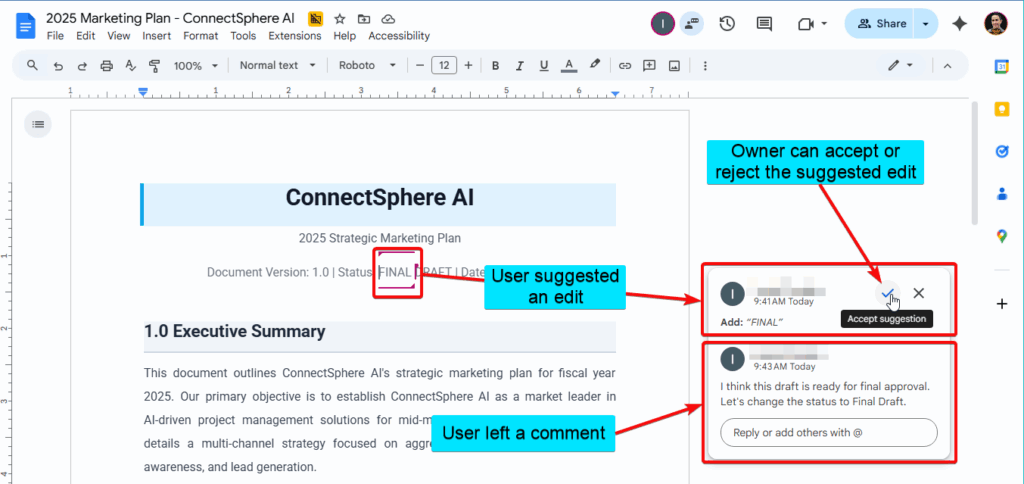
(Image provided by author)
This is the gold standard for feedback and review cycles. It keeps the original text intact while creating a space for collaborative input.
The Editor role is the least restrictive, granting (almost) full power. An Editor can:
(Image provided by author)
This is the role for true collaborators who are actively working on the document with you. Use this role when:
By now, you should have a good idea of what access level to grant to each stakeholder.
The question is, how do you do it?
To manage your document’s security, you first need to know where to find the control panel. Google provides several pathways to access your sharing options, allowing you to manage permissions quickly from anywhere you work.
The big, blue “Share” button in the top-right corner of your Google Doc is your primary gateway. It can sometimes collapse into a smaller, circular “add user” icon depending on your screen size.
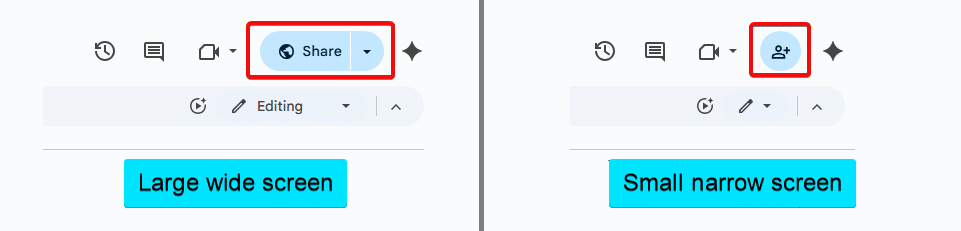
(Image provided by author)
This is the most direct way to manage who has access to the document you’re currently working on.
Clicking it opens the main sharing dialog box.
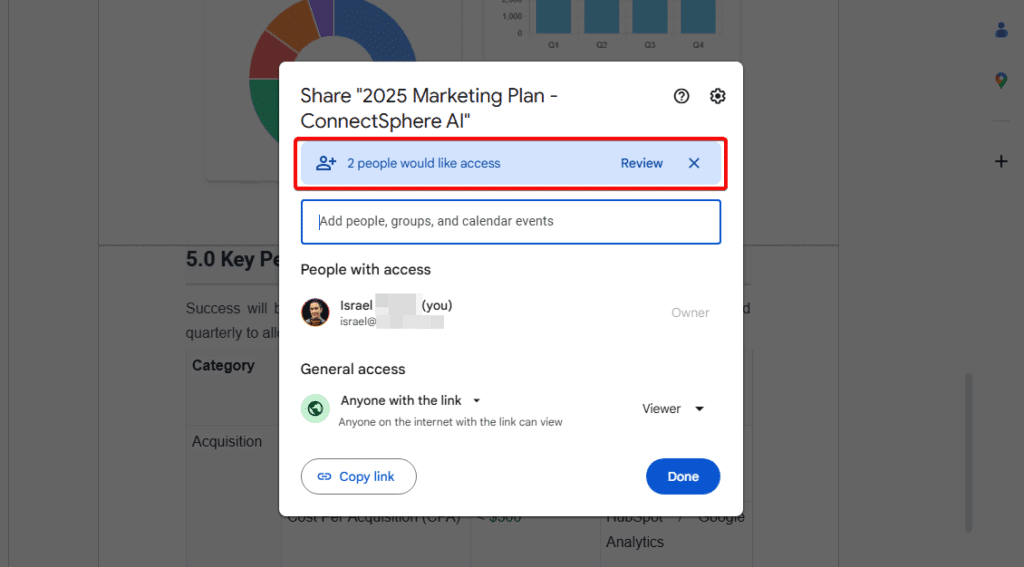
(Image provided by author)
Here, you can:
We’ll be spending a lot of time in this menu throughout the guide.
You can also access the same sharing options through the top menu bar. This method is less direct but good to know.
Simply navigate to File > Share > Share with others.
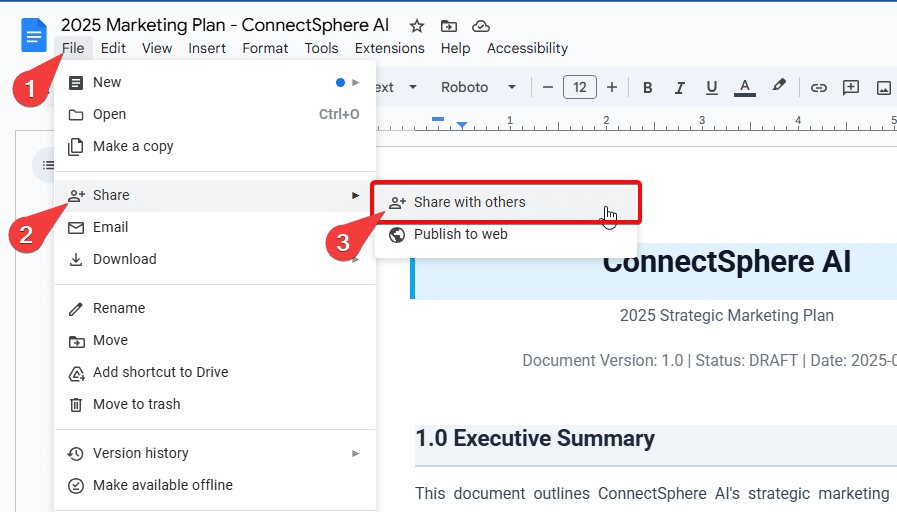
(Image provided by author)
This will open the exact same sharing dialog box as the blue “Share” button.
You don’t even need to open a document to manage its permissions. You can control everything right from your Google Drive, which is incredibly efficient for auditing multiple files.
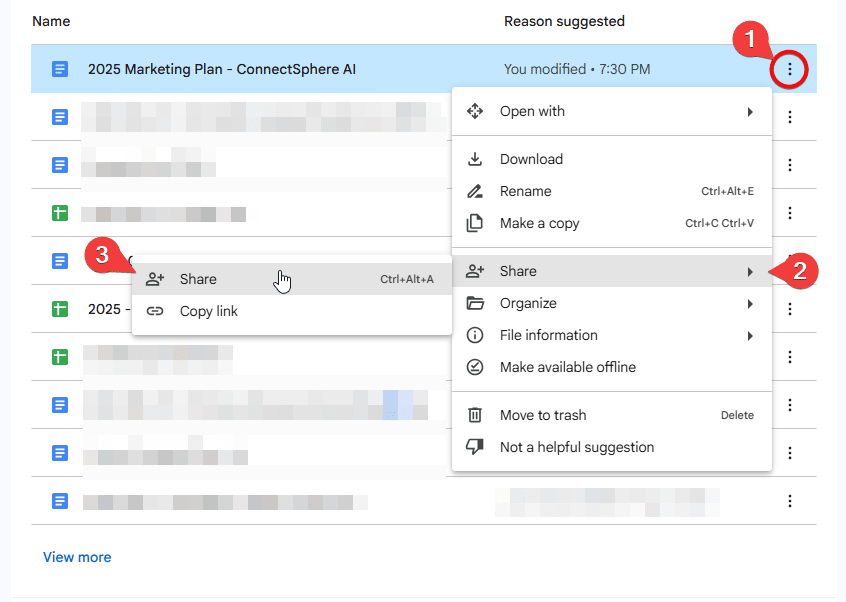
(Image provided by author)
Simply navigate to your Google Drive (drive.google.com), find the document you want to manage, and:
This is where many well-intentioned users make critical security mistakes. The method you choose to share your document—directly, via a link, or by publishing—has massive implications for its security.
It’s not about what access to grant, it’s about doing it right.
Let’s break down the options so you can make the safest choice every time.
When you first create a Google Doc, it’s set to “Restricted” by default. This is the most secure setting, aligning with Zero Trust cybersecurity frameworks (source: CrowdStrike).
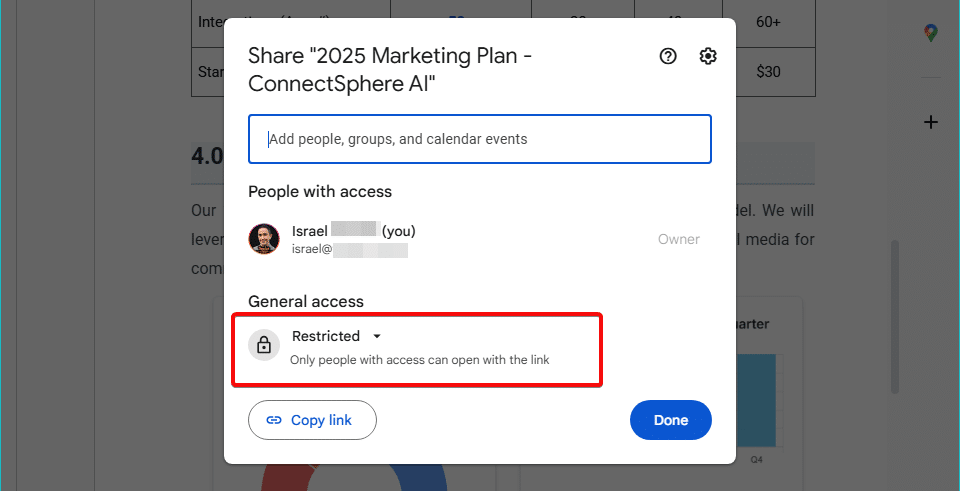
(Image provided by author)
It means that no one can access your document unless you have specifically invited their Google account via their email address. There is no shareable link that will work for the public.
This should be your default state of mind for almost all of the documents you create, especially those containing sensitive client data or internal strategies.
This is the most secure method of active collaboration. When you share directly, you are granting access to a specific Google account.
In the sharing dialog box, simply type the person’s email address into the “Add people and groups” field. You then assign them a role (Viewer, Commenter, or Editor) and can choose to send a notification email.
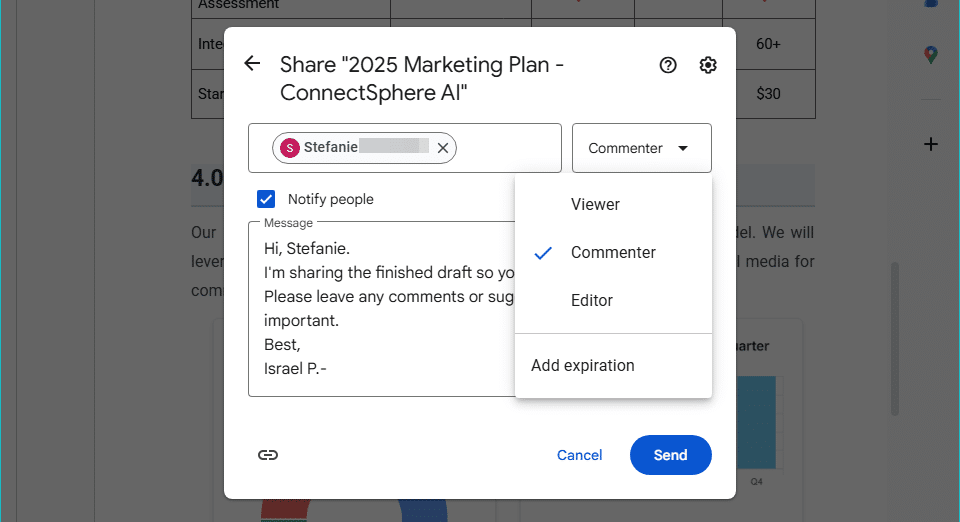
(Image provided by author)
For professional courtesy and clarity, always include a brief message in that email so the recipient knows why you’re sharing the document.
This method ensures that only the intended recipient can access the file after signing in to their Google account.
This option changes your document’s access from “Restricted” to “Anyone with the link.” As the name implies, anyone who has the link can open the document. You can still assign them a Viewer, Commenter, or Editor role, but you are no longer controlling who gets the link.
This setting trades security for convenience.
While it can be useful for broadly sharing non-sensitive information (like a public-facing help guide), it’s incredibly risky for confidential content. Someone could:
Once that happens, you lose all control over who sees your document.
When you use this setting, Google helps you stay aware. If you share the link with people outside your organization, a small building icon will appear next to the “Share” button as a visual cue.

(Image provided by author)
When an anonymous user (someone not logged into a Google account) accesses your doc via the link, they appear as an “anonymous animal” at the top of the page. This is a telltale sign that your document is unsecured.
“Publish to the web” is the most extreme form of public sharing and is often misunderstood. It creates a lightweight, standalone webpage version of your document that may look something like this:
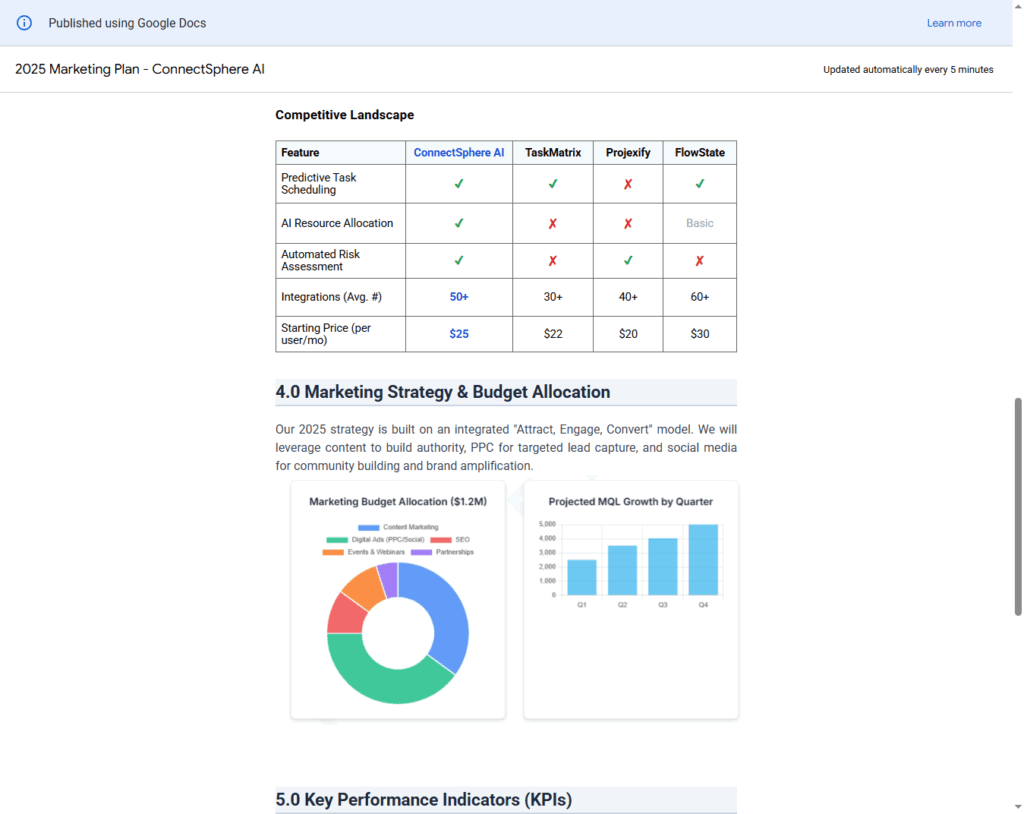
(Image provided by author)
You won’t find this feature in the “Sharing” dialog box, but under File > Share > Publish to the web.
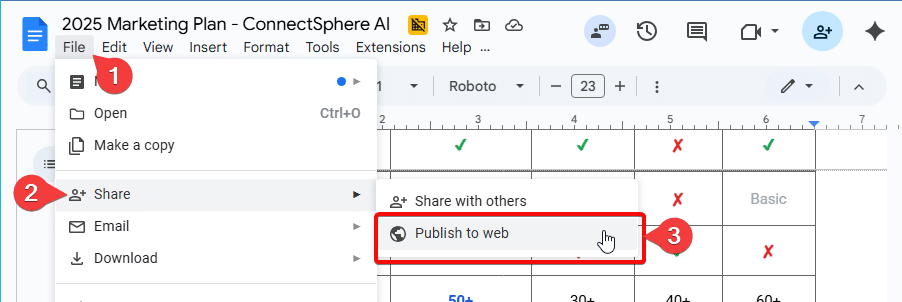
(Image provided by author)
It’s useful for embedding content on a website or sharing data that needs to be publicly accessible, like a Doc or Google Sheet on Google Sites.
However, it comes with a major security warning:
I would advise against using this particular feature.
Why?
Because, critically, publishing to the web isn’t affected by your other sharing settings:
Using a tool like Wordable to publish directly from Google Docs to your WordPress site is a much better way to stay in control than using this Google Docs feature.
For more granular control, Google Docs provides a suite of advanced sharing options.
The expiration date feature lets you give someone temporary access to a file. You can set their access to expire after a certain period, regardless of the access level (Editor, Commenter, or Viewer).
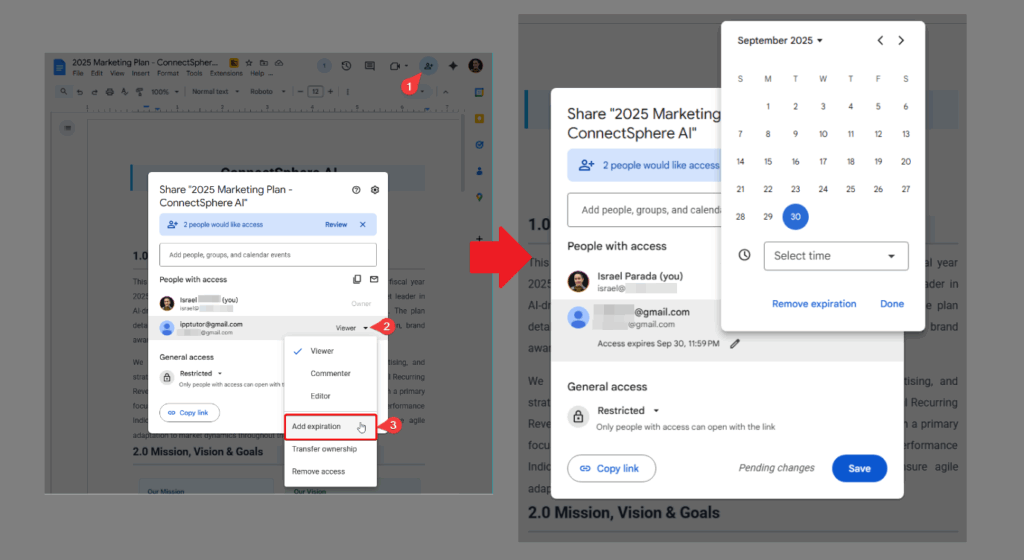
(Image provided by author)
Note that this feature is only available for paid Google Workspace accounts. It’s perfect for project-based collaborations. For example, you can:
Once the expiration date hits, their access is automatically revoked without you having to remember to do it manually.
For highly sensitive documents, you might want to prevent people from making their own copies. As the file owner, you can disable the ability for Editors, Viewers, and Commenters to download, print, or copy your document’s content.
You can find this setting by clicking the gear icon in the sharing menu.
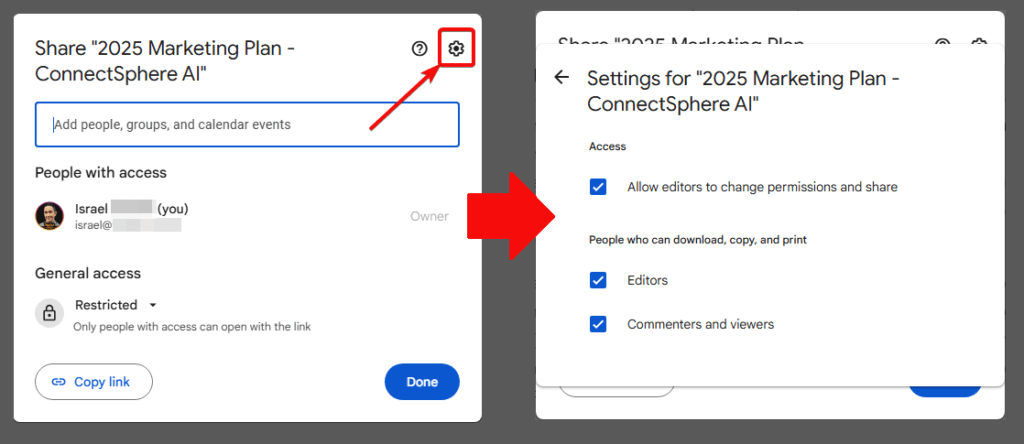
(Image provided by author)
When you enable this, the options for downloading, printing, and copying will be grayed out for other users. They’ll also get a notification on the document informing them of these security limitations.
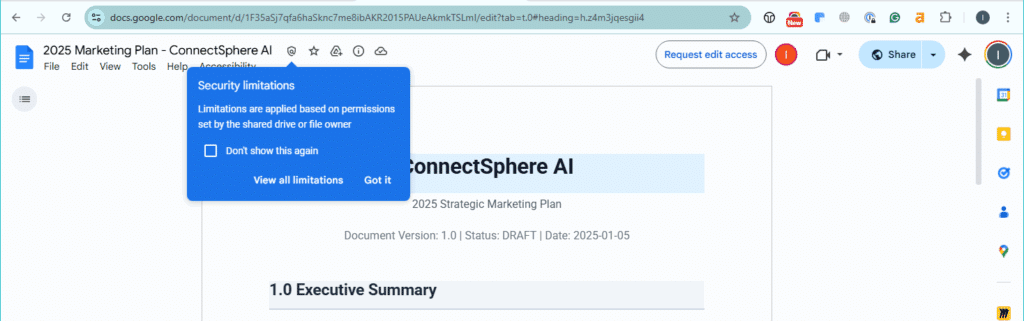
(Image provided by author)
They can also check the specific limitations the owner imposed on the document.
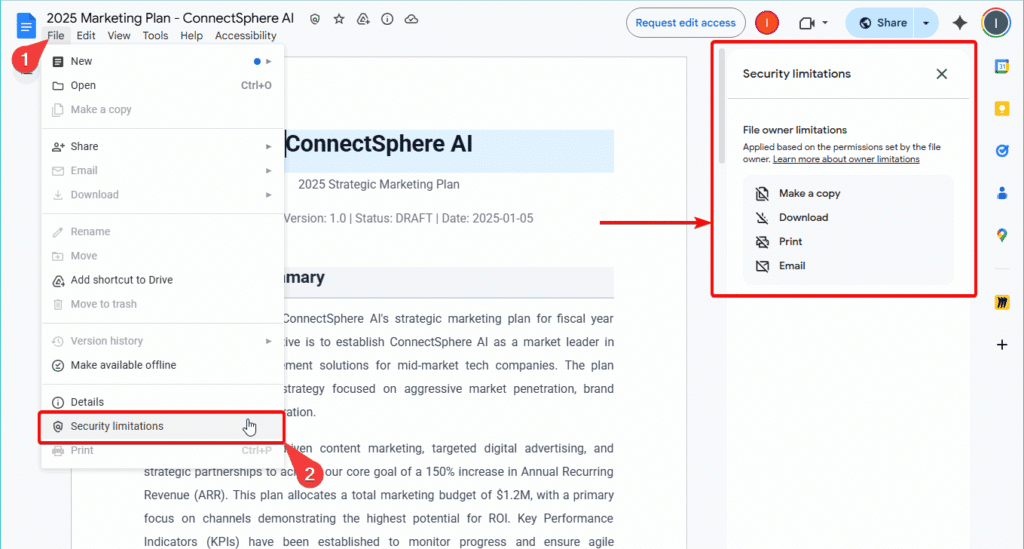
(Image provided by author)
When a user tries to copy text from a restricted document, they’ll get a warning message.

(Image provided by author)
Be aware that a determined person can bypass these restrictions using tools like:
Think of this feature as a strong deterrent against casual data leakage, not an impenetrable wall.
Sometimes, you need to hand over a document completely, not share it.
As a file owner, you can transfer ownership to another person, making them the new owner with full control.
The process is straightforward but involves a few key steps.
First, the person you want to make the new owner must already have direct access to the document. If they don’t, share the file with them directly via their email address.
Open the sharing dialog, find the person in the list of users with access, and click on their role. In the dropdown menu, select “Transfer ownership” and confirm.

(Image provided by author)
Google will send an email notification to the person you’ve designated. They must click the link in the email and accept the ownership transfer. The transfer is not complete until they take this action.
Once they accept, they become the new owner. You will be downgraded to an Editor. You can confirm this—provided they haven’t withdrawn your access rights, which they can now do—by looking at the sharing settings, where their name will now be listed with the “Owner” role.
Managing files on individual Google accounts is inefficient and risky for businesses. Google Workspace’s shared drives solve this. Unlike “My Drive,” where files belong to individuals and leave when they do, shared drive files belong to the team, ensuring data remains centralized and managed. This improves data security and project management.
For optimal use, strategize:
Mastering Google Docs sharing isn’t about becoming a security expert overnight. It’s about building simple, consistent habits that protect your content.
By understanding the difference between roles, choosing the right sharing method for the job, and regularly auditing who has access, you transform Google Docs from a potential liability into a secure and powerful tool for collaboration.Once your collaboration process is secure and your masterpiece is ready in Google Docs, Wordable can export it to WordPress in one click, perfectly formatted, saving you hours of tedious work. Try Wordable now!